Showing posts with label yeast free. Show all posts
Tuesday, August 2, 2011
Gluten Free Cinnamon Raisin Teabread/Muffins Recipe
On an outing with a good friend on Friday afternoon I found a "Breadman" bread maker at a favorite thrift store. It's an older model and by looks alone, I think it had barely been used. For $6, I figured it wasn't a bad investment if it worked. I washed the machine out thoroughly with hot, soapy water and attempted a gluten free loaf. It worked great for the sandwich bread! I couldn't find a full operating manual online, so I'm still playing around with the machine to see what the best cycle will be for my gluten free sandwich bread. I'm also trying to tweak a few recipes so I can come up with a gluten free "bread machine" recipe for you that works really well.
But I also wanted to prove that I could use this kitchen appliance for more than just one thing! I have an extremely tiny kitchen with barely any counter space -OR- cabinets.... so for this appliance to earn a spot, I have to be able to use it for a variety of different recipes! My husband suggested making cake. :-) He's a smart man.
Instead of cake, I decided to go on a healthier route and try a "teabread" -- I don't really know what signifies a teabread from a quick bread from a cake... but I liked the sound of it. I attempted one recipe from this popular vegan cookbook... but it was a flop. The batter was very wet and it just didn't work well in the bread maker (it's probably a great recipe for an oven -- just not the bread maker!). So instead, I went back to baking with the gluten free flours I know and created my own recipe. This is a variation of my standard gluten free cake recipe and I love the texture of this bread. It's just lightly sweetened and the aroma of cinnamon while it was baking made me smile. This is a soft, unassuming bread that pairs perfectly with a cup of Earl Grey.
Gluten Free Cinnamon Raisin Teabread -or- Muffins Recipe
created by Carrie Forbes of www.gingerlemongirl.com on 8/1/2011
free of gluten, soy, dairy/casein, and rice
Printer-friendly recipe
Makes 1 small 8 1/2" x 4 1/2" loaf, 12 muffins, or makes about a 1 lb. loaf in the bread maker.
Dry Ingredients:
⅔ cup sorghum -or- millet flour
⅓ cup arrowroot starch
⅓ cup garfava flour
1 ½ teaspoons baking powder
½ teaspoon salt
½ cup sugar
1 teaspoon cinnamon
½ teaspoon xanthan gum
Wet Ingredients:
½ - ¾ cup almond milk
¼ cup canola oil
2 eggs
1 teaspoon vanilla extract
Add In’s:
½ cup raisins
⅓ cup chopped pecans or walnuts
Directions:
For OVEN: Preheat oven to 350 degrees. Grease loaf pan or line a muffin tin with paper liners. In a large bowl whisk together all dry ingredients. In a smaller bowl whisk together all wet ingredients, using ¾ cup of milk. Pour wet ingredients into dry ingredients and mix together until fully combined. Pour batter into loaf pan or into a lined 12 muffin tin. For loaf bake 25-35 minutes until golden brown and a toothpick inserted in the middle comes out clean. Cool on a wire rack, then slice & serve if in loaf pan. This lightly sweetened bread is delicious with a cup of hot tea!
For BREAD MAKER: I used my breadmaker to make this bread on Sunday. I mixed up the ingredients by hand because it’s a very easy recipe and poured the batter breadmaker loaf pan to bake only. Follow the above directions as for oven, except only use ½ cup milk in the wet ingredients. Use the “bake” cycle on your bread machine and bake for 40-50 minutes until a toothpick inserted in the middle comes out clean. The first time you make this, check on the bread every 20 minutes or so just to make sure your breadmaker doesn’t bake hotter than mine does. Cool on a wire rack, then slice & serve. This lightly sweetened bread is delicious with a cup of hot tea!
Here was my first batch of gluten free sandwich bread straight from the bread machine. It was a really good bread. Once I get the measurements just right, I'll share the recipe with you! :-)
Labels:
bread maker,
breads,
breakfast,
cake,
casein free,
desserts,
gluten free baking tips,
yeast free
Monday, February 7, 2011
Gluten Free Almond Flour Double Chocolate Brownies Recipe
Here's a quick lower glycemic chocolate treat for you. I made these last night and was really impressed at how well they turned out! If you can tolerate almonds & eggs, I highly recommend these tasty little brownies. They are very fudgy & chocolately without a lot of sugar or simple carbohydrates.
Since I'm seriously watching my "sweets" intake, I ate one of these little brownies and wrapped the rest of them up and froze them. Michael loved them and took 2 to work with him. I don't feel bad about him eating these little brownies because they are full of healthy fats & just a little bit of sugar.
Almond Flour Double Chocolate Brownies
free of gluten, dairy/casein, and soy
created by carrie forbes of gingerlemongirl.com
printer-friendly recipe
Dry Ingredients:
2 1/2 cups (252 grams) blanched almond flour
1/4 cup (26 grams) cocoa
1/4 teaspoon salt
1 teaspoon baking soda
1/3 cup sugar -or- palm sugar (I used palm sugar)
Wet Ingredients:
1/4 cup canola oil -or- your favorite oil
2 eggs
1/2 cup + 2 tablespoons applesauce
1/2 teaspoons liquid vanilla stevia (optional -- but adds a bit more sweetness!)
1 tablespoon vanilla extract
Optional Add In's:
1/2 cup allergen free chocolate chips like Enjoy Life
Directions:
Preheat oven to 350 degrees. Line a 9 x 13" baking dish with parchment paper or spritz with non-stick cooking spray or oil. Whisk all dry ingredients together in a large bowl. In another bowl whisk together all wet ingredients. Stir the wet ingredients into the dry ingredients and finally fold in the chocolate chips. Pour the batter into the prepared 9 x 13" baking dish and spread evenly throughout with a spatula. Bake for 30-35 minutes until a toothpick inserted in the middle comes out (mostly) clean - you may run into chocolate chips, so there may be a little on the toothpick, or until the brownies, spring back just a little when you gently touch them. Allow to cool in the pan for 30 minutes, then cut into 24 brownies with a sharp knife. Eat one or two slowly and enjoy them! They are filling since they are made with almond flour! Wrap the rest & freeze! Pull one out when you need a chocolate fix!
Carrie's Notes:
- I added the weight measurements for the flours in this recipe for those that weigh their ingredients. If you don't use weight measurements, please note I pack almond flour in a cup much like you would brown sugar.
- I used palm sugar in this recipe to lower the overall white sugar content and glycemic index. Feel free to use the sugar or sugar substitute of your choice.
- Egg-Free - I'm fairly confident this recipe would work using a flax seed or chia seed egg substitute if you are intolerant of eggs. Here's a handy Vegan Egg-Free Baking Substitutes Chart.
- I used canola oil, because it's what I keep on hand... but use the oil you like best!
Labels:
brownies,
casein free,
chocolate,
healthy gluten free,
low carb,
low glycemic,
low sugar,
soy free,
yeast free
Tuesday, December 7, 2010
Gluten Free, Vegan Dark Chocolate Muffins Recipe
Late fall is the perfect time for hearty, dark chocolate, gluten free muffins. The taste of these muffins actually reminds me of an oreo cookie. Deeply chocolate, with just a touch of sweetness. I think our early snow this year prompted me to make muffins. During warmer weather I'm not a muffin fan. I'd rather have a smoothie... but when it's chilly and you need something to go with your mug of hot tea... this rich chocolately muffin fits the bill!
These muffins are also incredibly healthy. Rice free, corn free, soy free, egg free, xanthan gum free, dairy/casein free, gluten free, with very little refined sugar. If you like to make food for holiday gifts this muffin mix would be perfect! You can place the dry ingredients in a jar and then create a recipe card that includes the wet ingredients & instructions for baking.
The muffins themselves are a tad bit crumbly simply because I do not include xanthan gum or guar gum in this recipe (more for simplicity's sake than anything else) but feel free to add 1/2 teaspoon - 1 teaspoon for a more traditional muffin texture. For less crumbly muffins, allow them to rest on a wire rack to cool for at least 20 minutes and longer if possible.
Gluten Free, Vegan Dark Chocolate Muffins
free of gluten, dairy/casein, soy, corn, eggs, gums, rice, yeast
created by Carrie @ www.gingerlemongirl.com
printer-friendly recipe
Makes 12 regular muffins, or 24 mini-muffins
Dry Ingredients:
1/2 cup millet flour
1/2 cup blanched almond flour
1/2 cup sorghum flour
3 tablespoons cocoa powder
2 tablespoons ground flax seeds
1 teaspoon chia seeds
2 teaspoons baking powder
1/2 teaspoon cinnamon
1/2 teaspoon baking soda
1/4 teaspoon sea salt
Wet Ingredients:
1/2 cup applesauce or pumpkin puree
1/2 cup extra virgin olive oil -or- canola oil
1/3 cup agave nectar, maple syrup, or honey
1/4 cup almond milk
1 teaspoon vanilla
Add In's
1/3 cup Enjoy Life Allergen Free Chocolate Chips (these are minis - which work great for muffins!)
Directions:
Preheat oven to 350 degrees. Line a 12 cup muffin tin with paper liners. (I HIGHLY recommend using paper liners for this recipe.) In a large bowl whisk together all dry ingredients. In a smaller bowl mix together all wet ingredients. Pour wet ingredients into dry ingredients and mix together until you have a wet batter. Allow the batter to rest for 5 minutes to thicken. (The chia seeds & ground flax seeds will thicken the batter and give it the texture of a "regular" muffin batter.) Stir in the chocolate chips. Fill the paper liners about 3/4 full of muffin batter. Bake for 20-25 minutes until the a toothpick inserted in the middle of a muffin comes out with very few crumbs, or until you can gently touch the top of a muffin and it does not leave an impression.
Carrie's Notes:
- As stated above, these muffins have a very tender crumb (which is often the case with vegan muffins). If you want more of a cake like texture, feel free to add 1/2 teaspoon of xanthan gum or guar gum for a thicker muffin batter.
- Oil: I added more oil to this recipe than I generally use for muffins. This really helps the muffins stay moist and overall it means that there is about 2 teaspoons of oil per muffin (for 12). If you don't want to use 1/2 cup of oil, decrease the amount to 1/4 cup and add an additional 1/4 cup of applesauce or pumpkin puree. The only difference may be that the muffins will not stay quite as moist by day 2 or day 3.
- Chia Seeds & Ground Flax Seeds: These are both magical ingredients in egg free baking! Chia seeds have seriously ridiculous gelling power and help thicken up the muffin batter. Ground flax seeds have a wonderful "gelling" property as well, though it's not as potent as the chia seeds. I do recommend keeping the chia seeds in this recipe, if you don't have them another tablespoon of ground flax seeds should work just fine though.
- Paper Liners: Because these muffins are delicate, I think it's definitely a good idea to use paper liners. If these muffins stick to the pan without a liner, they may be very hard to remove all in one piece.
- Millet flour & Sorghum Flour: If you don't want to use these flours, feel free to exchange them for another whole grain gluten free flour such as brown rice flour, quinoa flour, or even buckwheat flour!
Wednesday, November 3, 2010
Gluten Free, Vegan Millet Bread (Mock Cornbread) Recipe
I realized several years ago that my body doesn't tolerate corn well. I used to make fun of my grandmother for complaining about the same ailment. She would always say that she loved popcorn, but it didn't love her. I thought she was just being fussy... and now I completely get it. She wasn't being fussy... she just doesn't like the side effects of corn. And neither do I.
Yet, one of my favorite foods is cornbread. I really hated having to give up cornbread. It's naturally gluten free. A few months ago I really wanted cornbread. I wanted to find a safe, gluten free, side-effect free recipe for a non-corn "cornbread."
Millet flour not acid forming and is considered one of the least allergenic gluten free flours. Therefore it is easy to digest and is a great option for baking.
I am so impressed with this flour as a substitute for corn. I made this millet "cornbread" last night and I think I could have eaten the entire pan. The millet flour created a just slightly dense cornbread (mostly due to the fact that I made it egg free) and it had a perfect "cornbread" crumb & crust. We ate this with a bowl of chili and it was a perfect "cornbread" side. If you try it, I would really love to know what you think!
Gluten Free, Vegan Millet Bread (Mock Cornbread) Recipe
free of gluten, soy, corn, rice, dairy/casein, and eggs
created by Carrie Forbes of Gingerlemongirl.com
printer-friendly recipe.
Dry Ingredients:
1/3 cup sorghum flour
1/3 cup arrowroot starch
1 cup millet flour
1 teaspoon
2 teaspoons corn free baking powder
1/2 teaspoon salt
3 tablespoons sugar
Wet Ingredients:
3 tablespoons coconut oil, melted (or other oil of your choice)
1 tablespoon EnerG Egg Replacer + 1/4 cup warm water -OR- 2 eggs
1 cup unsweetened almond milk + 1 tablespoon lemon juice -OR- 1 cup buttermilk
Directions:
Heat oven to 425 degrees. In a mixing bowl whisk together all dry ingredients. In a small bowl mix together all wet ingredients, it's okay if the coconut oil clumps up a bit when added to the cold ingredients. Pour the wet ingredients into the dry ingredients and mix together thoroughly with a fork into a wet batter. Place a heavy-bottomed oven-safe skillet or cast iron pan with 2 tablespoons of coconut oil or butter in it into the preheated oven for 5 minutes. Allow the oil to get hot enough to sizzle when a drop of water is flicked into the pan. Holding the hot pan with an oven mitt pour the millet bread batter into the pan and spread it evenly around the pan. Place back in the oven and bake for 18-20 minutes until golden brown and a toothpick inserted in the middle comes out clean. Let cool for 10 minutes before serving.
Carrie's Notes:
- I love using a cast-iron pan for this type of quick bread. It gives the millet a super delicious crispy crust!
- This would also be delicious if it were made with eggs, but I am out of eggs this week, so it was great to create an egg-free alternative. The bread still rose well and had a great texture.
- Any type of oil, other than olive oil would be great for this bread. I don't recommend olive oil because it might have too strong a flavor for the light tasting bread.
- Any type of non-dairy milk should work fine for this bread. I recommend mixing the lemon juice with the non-dairy milk and letting it set for about 3-4 minutes before adding it to your wet ingredients. It will thicken up like a buttermilk.
Tuesday, October 26, 2010
Gluten Free, Vegan Banana Bread Recipe
Gluten free, vegan banana bread. Egg free. Rice free. Dairy/casein free. Low sugar/ low glycemic.
A few years ago I completely turned my nose at anything labeled "vegan." I'm not really a fan of labels as it is... but then again you want people to visit your blog... so sometimes labels are helpful, especially to search engines. But I'm getting off topic... A few years ago I knew how to bake. I could bake the heck out of a banana bread, chocolate cake, brownies, apple pie, you name it... but it was always in the traditional sense. Wheat flour. Eggs. Sugar. Milk.
Nearly 5 years later that seems so boring. Anybody can cook & bake like that if they want too. It wasn't until I HAD to change my diet and cut gluten out of my life that I realized it was completely possible to bake without those traditional ingredients. You don't need wheat, eggs, sugar, or milk to make a good and delicious banana bread!
I didn't necessarily make this particular banana bread for people following a vegan diet. I made it for friends who have kids who can't eat eggs. I made it because I like thinking outside of the box. I made it because I like figuring out new ways to bake old favorite foods.
I've learned so much about non-traditional baking in the past 5 years and every day I learn more. If anything, I've realized there are truly no limits to what you can do in the kitchen. Just because you have food limitations doesn't mean that your life has to be boring or bland or no longer tasty!
That's the thing I love about gluten free baking. It seems hard at first, but once you step outside of that little American box you were accustomed too of prepackaged mixes, wheat flour, sugar, butter, and eggs... you realize the whole world has been baking with thousands of other ingredients for centuries.
So walk on the wild side with sorghum flour, blanched almond flour, or quinoa. Bake a batch of brownies with millet flour or brown rice flour or amaranth. Make an egg-free cake with ground flax seeds, chia seeds, or mashed bananas. Ditch the white sugar and sweeten a batch of brownies with molasses, agave nectar, local honey, or stevia.
Don't be afraid to try new things. You may not always end up with a perfect baked good every time, but you will have the joy of experiencing new flavors in your kitchen!
free of gluten, dairy/casein, rice, soy, and eggs
created by carrie @ www.gingerlemongirl.com
print-friendly recipe.
**Makes 3 "7.5 x 3.5" loaves of banana bread**
Dry Ingredients:
1 cup millet flour (5 oz., 140 grams)
1 cup sorghum flour (5 1/4 oz., 150 grams)
1 cup arrowroot starch (4 1/2 oz., 124 grams)
2 tablespoons ground flax seeds
4 1/2 teaspoons baking powder
1 teaspoon baking soda
2 teaspoons xanthan gum
1 teaspoon ground cinnamon
Wet Ingredients:
1 1/2 cups mashed bananas (about 3-4 small bananas)
1 tablespoon Ener-G Egg Replacer + 1/4 cup warm water (or 2 eggs)
1 cup non-dairy milk (I use almond milk)
1/4 cup canola oil, melted coconut oil, or grapeseed oil
1/2 cup honey, agave nectar, or sugar
2 teaspoons vanilla extract
Optional Add-In's:
1/2 cup chopped walnuts or pecans
1/2 cup allergen free chocolate chips
Directions:
Preheat oven to 350 degrees. In a large bowl whisk together all dry ingredients. In another bowl mix together all wet ingredients. Pour the wet ingredients into the dry ingredients and stir until you have a thick cake batter texture. Fold in chopped walnuts or chocolate chips if you are using them. Divide the banana bread batter into 3 (7.5 x3.5) greased loaf pans. (The batter should fill each pan about halfway full.) Add a few half pecans or walnuts to the top of your bread for decoration if you'd like. Bake in preheated oven for 25-35 minutes, or until loaves are golden brown, and a toothpick or sharp knife inserted in the middle comes out clean.
*Also makes 18-24 muffins. Line muffin pans with paper liners and fill about half full with batter. Top each muffin with a pecan if you'd like. Bake for 17-20 minutes until the muffins are golden brown and a toothpick inserted in the middle comes out clean.
Carrie's Notes:
- If you're opposed to using Ener-G egg replacer (or if you don't have any) I think you could make the banana bread or muffins without it, they just may not rise quite as high.
- Millet flour & sorghum flour: If you don't like these flours, use other whole grain gluten free flours that you like. Brown rice flour, quinoa flour, even bean flours would work just fine in this recipe.
- This is NOT a really sweet bread. Feel free to up the amount of sugar or honey to 3/4 cup - 1 cup. It should not affect the end result of the rise or texture or the bread.
- This bread is also delicious toasted and I think it would make GREAT french toast!
- You should be able to halve this recipe easily and make 2 larger loaves of banana bread. I like making it in the smaller loaf pans though because I think it gets a better rise. I use the same loaf pans to make Elana's Gluten Free Bread.
This recipe has been linked to Amy Green's Slightly Indulgent Tuesdays. Make sure to stop by and see all of the other yummy and slightly indulgent treats that are listed on today's roundup!
Monday, August 2, 2010
Gluten Free Almond Flour Pizza Crust Recipe
The kid may not like peanut butter, chocolate, chocolate chips, lettuce, or most vegetables... but he loves pizza. I'm not sure if there are too many kids who don't.
While Chris was at our house, most of his meals were gluten free... simply because I just won't buy things with gluten. It's a scary monster that I don't want in my kitchen. My husband is very lucky that I still let him buy "regular" wheat bread and cereals... or maybe I'm the lucky one, since he puts up with me! Yes. It's most definitely the latter.
One afternoon we decided to make pizza. And not just any pizza. Pizza made primarily from almond flour. Amazingly I told Chris it was just pizza, and he didn't even question what the crust was made of. Score one for the aunt.
I've been using almond flour in most of my recent baking. It's low glycemic and it's easier on my blood sugar than using a lot of gluten free grains and starches.
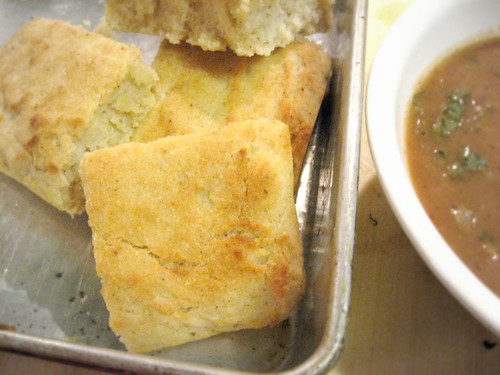
This is how the crust turned out. It was beautiful. I almost reached for a tissue. I was proud! I made a thick crusted 12" pizza with this dough, but I think next time, I would split this dough in half and make two thin crust pizzas. The crust was golden & crusty on the outside, and soft and pliable on the inside.
It made a perfect gluten free pizza. No one complained. Even the husband ate 3 pieces. And they had no idea that it contained something healthy other the almond flour.
White beans. Cleverly hidden little mashed white beans for some extra fiber and just because I wanted to see if it would work. My husband is not a huge fan of beans and I suspect my nephew isn't either. And they never knew it was hiding in their pizza.
We used regular mozzarella on this pizza. I was completely out of my non-dairy casein free Daiya cheese. I knew better. In hindsight the next time this happens, I'll just leave a few slices cheese-less so my tummy will be happy. My tummy was not happy. I think just this once though, it was worth it to watch my nephew create that happy smile on our delicious almond flour crust pizza.
My tummy has since forgiven me.
Gluten Free Almond Four Pizza Crust
Adapted from The Comfy Belly
(Free of gluten, soy, casein, yeast, and grains)
Printer-friendly recipe.
Makes 1 large 12"-14" thick pizza crust -or- 2 medium sized gluten free thin crust pizzas.
Dry Ingredients:
2 cups almond flour
1/2 teaspoon salt
1/4 teaspoon baking soda
1 teaspoon oregano
1 teaspoon garlic powder
1 teaspoon basil
Wet Ingredients:
3/4 cup mashed white beans, such as navy beans or cannellini beans
3 eggs
3 tablespoons olive oil
Directions:
- Preheat oven to 350 degrees. Line a 12" round pizza pan with parchment paper.
- In a large bowl mix all dry ingredients together.
- Make a well in the center of the dry ingredients and add all the wet ingredients.
- Mix the wet & dry ingredients together thoroughly. You will have a very wet dough.
- If you're making two pizzas split the dough in half.
- Spread the dough in a circle on the parchment paper with a spatula. It may help to wet the spatula with water or spritz it with non-stick cooking spray to keep the dough from sticking.
- Pre-bake the dough in the preheated 350 degree oven for 10-12 minutes until they are golden brown.
- Add toppings and bake an additional 10-15 minutes until your toppings are cooked through or melted.
- Cool pizza for about 5 minutes and then serve!
- Enjoy!
Saturday, May 15, 2010
Gluten Free Simple Egg Drop Soup

One of my favorite pre-gluten free (pre-getting healthy) meals was egg drop soup from a Chinese restaurant.
I have no idea what's actually in egg drop soup from Chinese restaurants (other than eggs of course) but from the thick "gel"-like texture my guess is that it's probably not gluten free, and even if it is, it's probably not a substance we should be eating anyway.
My version of this soup is much more healthy with very little added salt, fresh spinach (from the CSA this week), minced garlic, and a lot of love.
Instead of making a pot of rice to go with this soup (as I would normally order at the Chinese restaurant) I just added a handful of naturally gluten free thin vermicelli rice noodles. I love the texture these noodles add to the soup. They are also a fun gluten free substitute for real ramen noodles, which are wheat based.
Simple, easy, one pot meal.

Simple Egg Drop Soup
Created by Carrie Forbes @ www.gingerlemongirl.com
(Free of gluten, soy, dairy, & corn)
Print-friendly recipe.
Ingredients:
4 cups low sodium -or- salt free vegetable or chicken broth (make SURE it's gluten free!)
2-3 eggs
3 cloves garlic, minced
1 teaspoon dried onion flakes -or- 1/2 cup fresh chopped sweet onion (optional)
Small handful of rice vermicelli noodles (optional)
2 cups fresh spinach, chiffenaded (your cooking school term for the day! :-)
1 tablespoon adzuki bean miso tamari -or- coconut aminos
Freshly ground pepper, to taste
Pinch sea salt
Method:
Bring chicken or vegetable broth to a rolling boil. Whisk eggs gently in a bowl and then pour slowly into rolling broth. Stir broth. Add minced garlic, onion, and rice noodles. Cook for 5-10 minutes on medium-high heat. Take soup off of heat. Add spinach, adzuki bean miso tamari or coconut aminos, and freshly ground pepper. Cover soup and allow it to continue to "cook" off of the heat for another 5 minutes or so until spinach is bright green and slightly wilted. Serve immediately with a pinch of sea salt. Makes 2-3 large servings.
*********
Another reason I love this type of soup is it reminds me of Japanese ramen soup. Here are a few clips from one of my favorite foodie movies starring the late Brittney Murphy entitled "The Ramen Girl." If you're anything like me, you will HAVE to make a bowl of your own version of a ramen soup after watching this sweet, endearing, heartfelt movie.
Thursday, May 6, 2010
Gluten Free, Vegan Chocolate Cake Recipe
It took a great deal of restraint not to make another "trial" run of this cake tonight. I really think I could eat it for dinner.
My wonderful friend Clara started making a vegan version of my original gluten free Everyday Chocolate Cake for her husband's co-workers. She said the cake was always completely demolished by her husband's friends.
I decided to try the vegan version of the cake late last year when I was trying a vegan diet for a few months. Clara's right on the money... it's great veganized!
Who needs eggs to bake a good cake?
The cake is slightly more dense than a baked good made with eggs, but that just adds to the wonderful chocolately goodness of this gluten free cake.
I love being able to bake without eggs. Not only is it easier on your wallet and a very frugal option, it's also great to be able to get all your ingredients out of the pantry. It's also a great skill to be able to bake for people with multiple food allergies or for people who choose to follow a vegan or vegetarian diet!
Many thanks to Clara, of Six Food Intolerance Living for helping me learn how to remake my Everyday Chocolate Cake. You rock Clara girl!
Gluten Free, Vegan Chocolate Cake
(Free of gluten, soy, dairy/casein, & eggs)
Created by Carrie Forbes @ Gingerlemongirl.com
Adapted to be vegan by Clara Ogren, Six Food Intolerant Living
Printer-friendly recipe.
Dry Ingredients:
1/3 cup brown rice flour
1/3 cup arrowroot starch -or- tapioca starch
1/3 cup sorghum flour
1/4 cup unsweetened baking cocoa
1/2 teaspoon xanthan gum
3/4 cup sugar
2 teaspoons baking powder
1/4 teaspoon baking soda
Wet Ingredients:
3/4 cup rice milk -or- almond milk
1/4 cup canola oil -or- melted coconut oil
1/2 teaspoon vanilla
1/2 cup applesauce
Optional Add In's:
1/4 cup allergen free chocolate chips (Clara says the chocolate chips really MAKE this cake!)
Directions:
Preheat oven to 350 degrees. Spritz an 8" cake pan with non-stick cooking spray or grease with canola oil. Alternately you can line a cake pan with parchment paper to make sure the cake doesn't stick to the pan. In a large bowl whisk together all dry ingredients and set aside. In a smaller bowl blend together all wet ingredients. Mix wet ingredients into dry ingredients. Fold in chocolate chips. Pour batter into greased or parchment paper lined cake pan. Bake cake for 18-25 minutes. Test the cake for doneness with a toothpick or a butter knife. If the toothpick or knife comes out clean after being inserted in the middle of the cake, it's done. Make sure not to over bake. Allow the cake to cool before frosting with your favorite icing. This recipe also makes 12 regular sized cupcakes.
Wednesday, March 24, 2010
Soft, Chewy, Gluten Free Chocolate Chip Cookies

I’ve been experimenting with creating a lot of egg free recipes lately. I like being able to have the flexibility to bake egg free. Gluten free can be a challenge, but I think egg free is an even greater challenge and it’s fun to see what can happen in my kitchen without using eggs.
Today’s chocolate chip cookies are a little edgy. They are soft, chewy, and prone to be overeaten.
I’ve been using honey a lot in my baking lately and one truly nice thing about honey is that makes cookies soft and delicious.
Honey is a humectant. It help to keep baked goods moist naturally. I like that.
I adapted this recipe from a basic chocolate chip cookie recipe in the old Betty Crocker standby. The thing I love about converting “regular” recipes is that you have to be creative. Try what works. Use what’s in your pantry. See what happens.
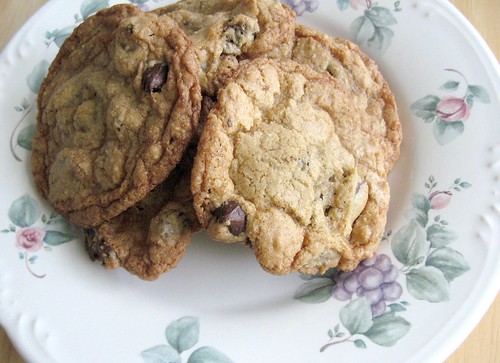
I think you’ll like how these cookies turned out. They are not super crunchy on the outside like my favorite chocolate chip cookies, but these are perfect for those of you who want a chewy, soft throughout cookie!
The combination of using a “flax egg” (1 tbsp. ground flax seeds mixed with 3 tbsp. HOT water & set aside to gel) + the addition of honey in these cookies creates the chewy texture and soft mouth feel.
Feel free to substitute raw honey, agave nectar, or even molasses in place of the honey used in this recipe. I think molasses would add a raw kiss of spunk to your cookies!
Enjoy!

Gluten Free Soft & Chewy Chocolate Chip Cookies
Gluten Free, Casein Free, Egg Free, Soy Free, Corn Free
Created by Carrie Forbes @ www.gingerlemongirl.com
Printer-Friendly Recipe
Preheat oven to 375 degrees.
In the bowl of your stand mixer or in a large mixing bowl add:
- 1/3 cup coconut oil
- ½ cup + 2 tablespoons granulated sugar
- 2 tablespoons honey
- 1 teaspoons vanilla
In a small bowl mix together your "flax egg" (or use 1 large egg):
- 1 tablespoon ground flax seeds
- 3 tablespoons HOT water (I generally use boiling water, I think it helps the flax to “gel” better)
In a medium sized bowl whisk together the following dry ingredients:
- 1/3 cup sorghum flour
- 1/3 cup brown rice flour
- 1/3 cup arrowroot starch
- ¼ cup potato starch
- ½ teaspoon baking soda
- ½ teaspoon xanthan gum
- ¼ teaspoon salt
Lastly fold in:
- 1 cup allergen free chocolate chips
- *Optional: 1/4 cup gluten free rolled oats
Drop cookie batter by teaspoons onto a cookie sheet that has been lined with parchment paper or a silpat mat. Bake for 8-10 minutes until cookies have spread into a 2-3” diameter and are golden brown on the edges. Remove cookies from oven and allow to cool on pan for 2-3 minutes. Move cookies to wire cooling rack until completely cool. Store in an airtight container. Makes 24 (2-3”) cookies.
Tuesday, February 23, 2010
Basic Gluten Free Pancakes for National Pancake Day
One of my fondest memories growing up was eating my Dad's pancakes on Saturday mornings. He learned how to make pancakes when he was 8 years old. My grandmother taught him so he could make his own breakfast because he enjoyed sleeping late. (So that's where I get that from!) Dad's still making these pancakes and they have always been my favorite.
I've made a lot of gluten free pancakes since August 2007. I've enjoyed nearly every recipe I've made. But it's been a long time since I had my Dad's pancakes.
Most of the gluten free pancakes I've made have been from a mix. My favorites have been from this homemade gluten free master baking mix, and from Bob's Red Mill.
But I wanted to make my Dad's pancakes. His pancakes were slightly thin, but fluffy, soft, and completely mouth watering!
Somehow in the past three years I never thought to simply take my Dad's recipe and adapt it to be gluten free. This week I decided to do just that.
Michael's first comments after biting into my Dad's recipe for (now gluten free) pancakes: "Honey, these are the best pancakes you've made yet. Who's recipe is this? This is EXACTLY what pancakes are supposed to taste like. These are fluffy, buttery, moist, and they make me smile."
Not sure where the buttery part came in since we don't use butter... but I really love my husband!
If you want a very simple and basic gluten free pancake recipe, this is it. It uses 2 gluten free flours that are most likely in your pantry right now. No xanthan gum. No mix needed. Make these for your family this saturday morning and start a delicious tradition... or have them for dinner like we did tonight! :-)
Dad's Best Pancakes (Made Gluten Free)
-Or- Basic Gluten Free Pancakes
Adapted by Carrie Forbes @ Gingerlemongirl.com
(Free of gluten, casien, and soy)
Dry Ingredients
3/4 cup brown rice flour
1/2 cup tapioca starch
1 1/2 teaspoons baking powder
1 teaspoon sugar
1/2 teaspoon salt
Wet Ingredients
1 teaspoon vanilla
1 egg
1 cup non-dairy milk (I used almond milk)
1 tablespoon canola or grapeseed oil
Directions:
In a medium sized bowl add all dry ingredients and whisk together thoroughly. Make a well in the center of the dry ingredients and add the vanilla, an egg, 1 cup of non-dairy milk, and the oil. Whisk wet ingredients together with dry ingredients until thoroughly mixed. You will have a very wet, but slightly thick batter that will cling to the whisk. Brush skillet or non-stick pan with olive oil or non-stick spray. Heat pan on medium high heat until it's hot enough to make a drop of water sizzle. Pour a few tablespoons - 1/4 cup of batter per pancake. Cook until bubbles form on the top and pop and the edges are slightly dry. Flip and cook the opposite side for 1-2 minutes. Serve piping hot with casein free margarine or ghee and real maple syrup!
Enjoy!
(Printer-friendly recipe)
Monday, February 1, 2010
Perfect Gluten Free Popovers Recipe
I made popovers several times before I went gluten free and I remember them being "okay", but nothing spectacular.
But these gluten free popovers? Oh my goodness they are SO delicious. Light, airy, and crispy to the touch on the outside with a lucious warm custard on the inside. They are similar in taste to pancakes, but have such a wonderful crisp texture and flavor. We like them best right out of the oven hot and steaming... but they are also delicious with casein free margarine and jam.
Either way, I think if you make these once... you'll be hooked.
You can certainly buy a popover pan which would yield much higher rising popovers... but it isn't necessary. They are just as delicious short in a muffin pan! There are several things you can do to make your popovers rise higher:
- Get your muffin or popover pan HOT before you add the batter. I actually just add my muffin pan to the oven as it's heating, so it gets REALLY hot before I add the batter.
- Use eggs that are at room temperature. The colder the eggs the less rise you'll have on the popovers. I'll pull my eggs out of the fridge about an hour before I plan on making them.
- If possible use a blender to mix your batter. Blend it by pulsing it just for about 30 seconds. Do not overbeat your batter. You don't want the structure of the eggs to break down. If you use a blender for about 20-30 seconds, you'll get just enough air added into the eggs to create a great rise on your popovers!
- Do not open the oven for a full 25 minutes while baking!
- Pierce your popovers with a knife as soon as they come out of the oven to release the steam. This will help the popovers to keep their height.

Perfect Gluten Free Popovers
By: Carrie Forbes @ Gingerlemongirl.com
Gluten Free, Casein Free, Soy Free
4 eggs at room temperature
1 cup casein free milk (I use vanilla hemp milk)
1 tablespoon honey
1 cup all purpose gluten free flour mix (see below)
1/4 teaspoon salt
Directions:
Preheat your oven to 425 degrees. Place your muffin tin or popover pan in the oven to get very hot. In your blender add eggs, milk, and honey. Blend for about 10 seconds just to break the eggs and mix together. Add the flour and salt and blend another 20-30 seconds just until batter is incorporated and bubbly. When oven has preheated, remove hot pan with oven mitt. Spritz muffin cups or popover cups with non-stick cooking spray or brush with olive oil. Pour batter in hot muffin cups 2/3 full. Place pan immediately in hot oven and cook for 25 minutes and DO NOT OPEN the oven during that time. You want a completely draft free baking period! Remove the popovers from the oven after 25 minutes. Prick them with a fork or a knife to release the steam. Eat immediately plain or with casein free margarine and fruit jam!
All purpose gluten free flour mix:
2 cups white rice flour
2/3 cup potato starch
1/3 cup arrowroot starch (or cornstarch)
Mix together and store in an airtight container. Makes 3 cups of all purpose gluten free flour. This is a very starchy, low fiber gluten free flour mix, that is not necessarily healthy. But it does work well in recipes like this that need less dense flours for a light and airy end product!
Printer-friendly recipe.
Thursday, October 15, 2009
Gluten Free Vegan Cornbread Recipe

I really love cornbread. We usually eat cornbread in the fall because it's a perfect, lightly sweetened bread to go with homemade soups.
I wondered how easy it would be to make a "veganized" cornbread. Surprisingly, it wasn't that hard at all.
(This is my original gluten free sour cream cornbread, which is one of my most popular recipes.)
To create a vegan version, I skipped the sour cream and used hemp milk mixed with lemon juice. I promise, you won't miss the sour cream. I also used coconut oil instead of butter, and Ener-G egg replacer instead of eggs. Worked like a charm!
The texture is just slightly different, and it may not rise quite as high as quick breads made with eggs, but it worked. My revised recipe created a beautiful golden crust, a delicious texture that was both light and airy and slightly dense at the same time. I'm not exactly sure how to describe it... but Michael ate 3 peices... in one setting. Which is unheard of for Michael.
So therefore I'm declaring this egg free, gluten free, vegan cornbread a huge success. And I'll be making a double batch this weekend to go with a big pot of soup that we'll share with Michael's parents.
A perfect, rustic cornbread for this chilly autumn season.
Enjoy!
Delicious Gluten Free Vegan Cornbread
(Gluten Free, Soy Free, Vegan)
Created by Carrie @ Gingerlemongirl.com
3 Tbsp. coconut oil -or- vegan oil of your choice
3 Tbsp. sugar
1 tablespoon Ener-G Egg Replacer whisked with 1/4 cup warm water (or 2 eggs for a non-vegan gluten free bread!)
1 cup hemp milk mixed with 1 tablespoon of lemon juice
1/3 cup sorghum flour
1/3 cup tapioca flour
1/3 cup brown rice flour
2/3 cup yellow cornmeal
1/2 tsp. xanthan gum
2 tsp. baking powder
1/2 tsp. salt
Preheat oven to 425 degrees. Grease an oven-safe skillet or 8x8 baking pan with GF baking spray. In a medium-sized bowl mix together flours, cornmeal, xanthan gum, salt, and baking powder. In another medium-sized bowl, cream coconut oil and sugar together until light and fluffy. Add mixed Ener-G egg replacer and hemp milk mixed with lemon juice. Mix thoroughly. Slowly add flour mixture to wet ingredients. Pour into greased oven safe skillet or muffin tin (will make around 10 muffins). Bake for 18-20 minutes until golden brown and a toothpick inserted in the middle comes out clean. Let cool for 10 minutes before serving.
Printer-Friendly Recipe.
Carrie's Notes:
- Use any type of oil or non-dairy milk that you prefer. I use hemp milk exclusively in baking because of the quality of the product and it has a thickness that is similar to 2% milk.
- Feel free to experiment with the type of gluten free flours used here. Cornbread is very forgiving.
- If you want a more traditional cornbread, replace the brown rice flour called for with an additional 1/3 cup of cornmeal.
Wednesday, September 30, 2009
Healthy Oatmeal Cookie Bars (Gluten & Soy Free, Vegan)
Just in case you are in need of a gluten free vegan recipe fix today... here are some breakfast bars I created last night.
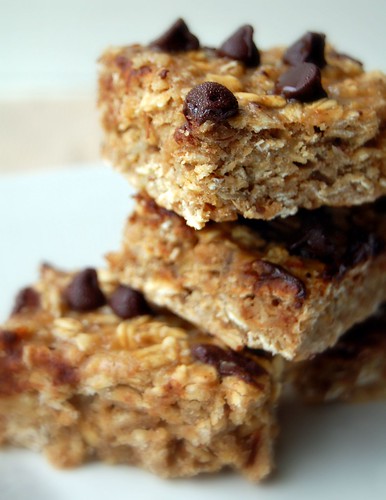
I don't have a picture for you, so you can use your imagination or pretend that they look like this. They actually look very similar to those bars, except our chocolate chips are actually mixed into the cookie batter!
This recipe makes 12 large cookie bars and I thoroughly enjoyed them for breakfast today!
Healthy Oatmeal Cookie Bars
(Gluten Free, Soy Free, Low Sugar, Low Fat, Vegan)
Created by Carrie @ Gingerlemongirl.com
Dry Ingredients:
- 2 cups gluten free rolled oats
- 1 cup shredded unsweetened coconut
- 1/2 cup brown rice flour (or whatever whole grain, gluten free flour you prefer)
- 1/4 cup brown rice protein powder
- 1/4 cup ground flax seeds
- 1 tablespoon baking powder
- 1 cup applesauce
- 3/4 - 1 cup non-dairy milk (I used rice milk)
- 3 full-droppers of vanilla creme stevia -or- 1/2 cup sugar (I used stevia)
- 1/4 cup chopped dates
- 1 cup allergen free chocolate chips
- 1/2 cup chopped walnuts or pecans
- 1/2 cup dried cranberries or raisins
Directions:
- Preheat oven to 350 degrees and spritz a 9x13" baking dish with non-stick cooking spray or grease with coconut oil. Set aside.
- Whisk all dry ingredients together in a large bowl.
- In a smaller bowl mix wet ingredients together.
- Pour wet ingredients into dry ingredients and stir together to create a wet batter. The batter should be slightly on the wet side like a stiff muffin batter. Add more liquid by the tablespoon if your batter is too dry.
- Stir chocolate chips and/or other add in's into batter.
- Pour batter into the greased 9x13" pan and spread with a spatula.
- Bake for 35-45 minutes until the bars will "bounce back" when lightly touched with your finger or until a toothpick inserted in the middle comes out clean.
- Cut into 12 large bars. Cool in pan or on a cooling rack.
- Store leftovers (if there are any) in the refrigerator in a tightly sealed container.
Michael and I are heading to Sevierville, TN next week to celebrate our 5th anniversary!
If you know of any delicious gluten free dining establishments in the Gatlinburg to Pigeon Forge area that you can share with me, I'd LOVE to hear from you!
Please let me know in the comments or send me an email @ gingerlemongirl (at) gmail (dot) com.
Tuesday, September 22, 2009
Potato and Spinach Enchiladas (Gluten Free, Vegan, Soy Free)
We spent last weekend on Ocracoke Island. It's a quiet, beautiful seaside village on a small island off the coast of North Carolina. It's one of the few places that never seems to change. We visited the wild ponies, the Ocracoke Preservation Society (one year I AM going to win that quilt!), walked around Silver Lake, and even visited the Community Grocery Store which amazingly sold gluten free baking mixes, flours, and cereals! We were even able to find great dining choices for vegetarian meals.
While the weekend went by quickly it was a lovely trip.
Sunday night when we arrived home from Ocracoke I made a delicious last minute dinner using the green sofrito seasoning base we made last week. I always have corn tortillas in the house, so by making a quick filling, you can have an instant meal. Enchiladas are easy to make and create a healthy and satisfying dinner.
Use what you have on hand to make these enchiladas. Don't have pink beans? No problem... use pintos, black beans, or red beans. Don't have any fresh or frozen spinach? Use green beans, broccoli, kale, romaine lettuce, or cabbage! Don't have a baking potato? Use a sweet pototo, rice, or pasta!
Get creative and get cooking! Enjoy!

Potato and Spinach Enchiladas
(Gluten and Soy Free, Vegan)
Created by Carrie Forbes @ www.gingerlemongirl.com
Originally posted online Tuesday September 22, 2009
3 tablespoons prepared green sofrito
6 cups fresh spinach, chopped & rinsed
1/2 cup grape tomatoes, quartered
1/2 cup of your favorite salsa
1 large baking potato, washed and diced
Half of a (15.5 oz.) can of your favorite cooked beans (I used pink beans), drained and rinsed
Freshly ground salt & pepper, to taste
10 corn tortillas
Directions:
- On the stove, boil the diced potato in enough water to cover (or in a microwave safe bowl on high for about 5-6 minutes) until fork tender, drain and slightly mash. You want a very chunky potato mixture. Set aside.
- In a large non-stick pan saute sofrito for 3-4 minutes on med.-high heat to release the savory oils and fragrance.Add chopped spinach and diced grape tomatoes and cook until spinach is bright green and wilted.
- Add salsa, chunky mashed potatoes, and cooked beans. Mix thoroughly with spinach mixture and heat through.
- Wrap corn tortillas with a damp paper towel or cloth and heat them for about 1 minute in the microwave.
- TO serve: Add 3-4 tablespoons of potato-spinach mixture in the middle of warmed tortillas and wrap tortillas quickly around mixture. Pour a little salsa over each wrapped enchilada and serve immediately.
Printer-friendly version.
Friday, August 7, 2009
Gluten Free Chocolate Chip Cookies Recipe - Take 2

Sometimes even a great recipe needs a few changes.
These cookies were one of the first successful gluten free recipes I created. This recipe was originally posted in November 2007. The recipe has since won a gluten free baking contest, sparked chocolate chip cookie debates on the Gluten Free Recipe Swap Group, and been a great conversational dessert for gluten eating friends.
Yet, despite how good the cookies are, I have received quite a few emails from readers who had trouble making them. A few of the problems people have encountered:
- the cookies spread
- some people do not want to use Crisco for nutritional reasons
- the cookies turned out too gooey in the middle
- the cookies did not puff up, etc…
So... I’ve made some changes.
I’ve worked with this recipe for over 2 years and I’ve changed an ingredient, updated the technique of forming the cookies and I hope I’ve come up with a recipe that will bake up beautifully for you!
The original recipe is still the base. As a matter of fact I’ve only changed one ingredient. BUT… the method of baking is slightly different.
- When spooning the cookie dough onto the baking sheet only use about 1 tablespoon of dough per cookie. It doesn't sound like much, but the cookies will spread just enough to make a round 1"-2" cookie.
- When you are baking these cookies I highly recommend using a silpat mat or a sheet of parchment paper. Unfortunately no matter how you create them… gluten free baked goods just stick. Parchment paper (or a silpat mat) not only prevents the cookies from sticking, but it helps them to spread into their proper cookie shape.
- I also leave the cookies undisturbed on the parchment paper or mat after baking for about 20 minutes before putting them on a wire rack to finish cooling. This helps the cookies to cool into their shapes and helps the cookie structure “stay put.”
As far as the ingredient change, I started using Spectrum Palm shortening as the “fat” in the recipe. Unlike Crisco, the Spectrum Palm oil is completely free of trans-fats. Spectrum is organic and is 100% expeller pressed palm oil. I’ve found (after making these cookies many times) that you only need half the amount of palm oil compared to the Crisco. So while Spectrum Palm Shortening is more expensive, you’ll only use half as much!
Are you ready to try the *new* best gluten free chocolate chip cookies ever? I want to hear about your results!! Please email me at gingerlemongirl (at) gmail (dot) com or post a comment below!

The Best Gluten Free Chocolate Chip Cookies
Created by Carrie @ http://www.gingerlemongirl.com
(Free of gluten, casein, and soy)
Wet Ingredients:
1/4 cup Spectrum Palm Shortening
1/4 cup granulated sugar
3/4 cup brown sugar
1 egg
1 1/2 tsp. vanilla extract
Dry Ingredients:
1/2 cup tapioca flour -or- arrowroot starch (lately I've only been using arrowroot)
1/2 cup sorghum flour -or- millet flour
1/4 cup brown rice flour
1/2 tsp. kosher salt
1/4 tsp. xanthan gum (optional)
1 tsp. baking powder
1/2 tsp. baking soda
Add In's:
6 oz. gluten free or allergen free chocolate chips
Directions:
Preheat oven to 350 degrees. In a large bowl: cream butter with sugars until light and fluffy. Add egg and vanilla. In a separate bowl mix together flours, salt, xanthan gum (opt.), baking powder, and baking soda. Slowly add flour mixture to butter and sugar mixture. Lastly, mix in chocolate chips. Place tablespoon sized dough portions 2 inches apart on a cookie sheet lined with parchment paper or a silpat mat. Bake 7-9 minutes or JUST UNTIL edges are light brown.
(The cookies WILL NOT look completely cooked when you pull them out of the oven! That's what you want! That's part of the secret to these awesome cookies! DO NOT overbake them!)
Allow cookies to cool undisturbed on parchment paper or silpat mat on the cookie sheet for 10-15 minutes. Then move cookies to wire baking rack to continue cooling. Store cookies in an airtight container on the counter.
This recipe doubles easily.
(Printer-friendly recipe.)
Carrie's Cooking Notes:
- Xanthan gum is completely optional in this recipe, but I think adding just a tiny bit makes for a chewier gluten-free cookie and helps the cookie to retain its proper shape!
- Egg Free option: If you cannot have eggs, simply use 1 tablespoon of ground flax seeds mixed with 3 tablespoons of warm water to replace the egg in this recipe. It still makes fantastic gluten free (egg free!) chocolate chip cookies!
- Sorghum flour -or- millet flour: I love both of these gluten free flours. Some people detect a bitter taste in sorghum flour, if that is the case for you, I definitely recommend using millet flour. It does not have a distinct taste and works beautifully in these cookies! The only downfall to using millet is it may create a very slight "grainy" texture in the cookies.
- Use of other "sugars" in this recipe: I don't recommend using a different type of sugar in this recipe. The basic white granulated sugar and brown sugar are very important for the structure of these cookies. Other sugars such as turbinado, demerera, or date sugar may not work correctly in the cookies when baking.
- Other fats: You can use other fats in this recipe such as 1/4 cup coconut oil, or butter... but you may not get the same crisp results as you get with the Spectrum Palm Shortening. I recommend trying the cookies with the palm shortening first.
Thursday, July 30, 2009
Sweet Vanilla Blueberry Scones Recipe (Gluten Free, Casein Free, Soy Free)

Blueberries are the essence of summer. In North Carolina blueberries are one of the first fruits of the season. Ripened and ready for picking at the end of May through the hot, humid days of July, fresh plump blueberries will show up in pies, muffins, cakes, sauces, jams, jellies, and even over ice cream.
In Eastern North Carolina our locally grown blueberries have been available at small farmer’s markets, roadside stands, and even at our local Piggly Wiggly. Blueberries do not need to be cooked to be enjoyed. My favorite way to eat them is straight from the bush or right out of the container at the farmer’s market! I often buy a pint of blueberries just to keep in the fridge so that I can take a few out for a snack whenever I need something sweet. Blueberries are of course naturally sweet and have an abundance of heart healthy benefits, especially from the antioxidant rich dye in the skin.
I created the following recipe for vanilla blueberry scones when I received information on a blog recipe contest sponsored by the US Highbush Blueberry Council. I have to admit as much as I would love to be a savory chef, I am a baker at heart… so I decided to create a gluten free, casein free, and soy free scone with blueberries. I chose to use almond flour as my main gluten free flour in this recipe because it is lower in simple carbohydrates than most gluten free flours. If you have not used almond flour in your gluten free baking, I highly recommend it. While it is more expensive than most flours, it’s healthier for you, holds up incredibly well in baking, and is an easy replacement for wheat flour.
I am very pleased with this recipe and I hope you will enjoy it. If you are fond of blueberries please give this recipe a try and cross your fingers that the folks at the US Highbush Blueberry Council will enjoy these scones as well!

Sweet Vanilla Blueberry Scones
Originally created by: Carrie @ Ginger Lemon Girl
(Free of gluten, soy, and casein)
Dry Ingredients
3 cups almond flour
¾ cup cornstarch (or arrowroot powder)
1 ½ teaspoons baking powder
¼ teaspoon salt
¼ cup sugar
1/3 cup *Spectrum shortening
Wet Ingredients
1 egg, slightly whisked
2/3 cup non-dairy *milk
1 cup fresh or frozen blueberries (if you use frozen DO NOT defrost them!!)
1 teaspoon bourbon vanilla extract
Directions
Preheat oven to 350 degrees. Line a 9” cake pan with parchment paper and spritz with non-stick cooking spray. Set parchment lined pan aside. In a large bowl whisk together almond flour, cornstarch, salt, baking powder, and sugar. Using a fork and knife or a pastry cutter, cut Spectrum shortening evenly into the flour mixture until it resembles small peas. Set aside. In a small bowl mix together the whisked egg, non-dairy milk, and vanilla extract. Mix wet ingredients with dry ingredients until thoroughly incorporated. Lastly add blueberries and mix. Batter will be thick. Pour batter into the parchment lined cake pan and smooth with a spatula. Bake for 25-30 minutes until edges of the round scone are golden brown and a toothpick inserted in the middle comes out mostly clean with few crumbs. ** (See notes below on why this baking method is used for these scones.)** When scone is done, remove from oven and set aside to cool for several minutes. Cut round scone into 8 triangular scones. Serve warm with your favorite vanilla glaze.
Carrie’s Recipe Notes:
*I used Spectrum shortening in this recipe because it is casein (dairy) free and soy free. Feel free to use another type of shortening or butter in this recipe if you choose to do so!
*I used hemp milk in this recipe, because it is my favorite non-dairy soy-free milk. Feel free to use regular milk or the non-dairy milk of your choice.
*Almond flour - I purchase almond flour directly from Honeyville Food Products. Different brands of almond flour can vary in consistency and quality and the Honeyville brand is the best I have found so far and has the best baking results. It is also the least expensive in quantity and shipping than I have found elsewhere. For more recipes using Honeyville almond flour, visit Elana's Pantry, where I first learned about this fantastic product.
*Traditional scones are created and baked in triangles. This particular scone batter made with almond flour will not bake well in the free form of a triangle on a baking sheet; therefore the batter is made as a large cake and then cut into scone triangles upon cooling.
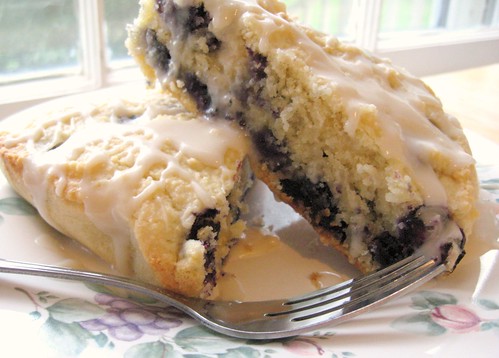
*Glaze – I made a simple vanilla glaze mixing powdered sugar, hemp milk, and vanilla extract until I had the consistency needed for drizzling.
Printer-friendly recipe.
Subscribe to:
Posts (Atom)
This work is licensed under a Creative Commons Attribution-Noncommercial-No Derivative Works 3.0 Unported License