Showing posts with label quick and easy. Show all posts

Saturday, October 25, 2014

An October Food & Exercise Update & Kittehs


October has been a busy month! We participated in another 5K, this was focused on Autism Awareness in Greenville, NC. We participated with a BUNCH of kids who were part of a running club (I had no idea such a thing existed for kids!) and it was so inspiring to see these kids take part of a 5K (and completely kick our butts along the way! lol)... It was a really fun event! Michael and I both finished around 49 minutes which was a record for us! I had burning lungs, but it felt really good to shave 6 minutes off my time from the September 5K! 
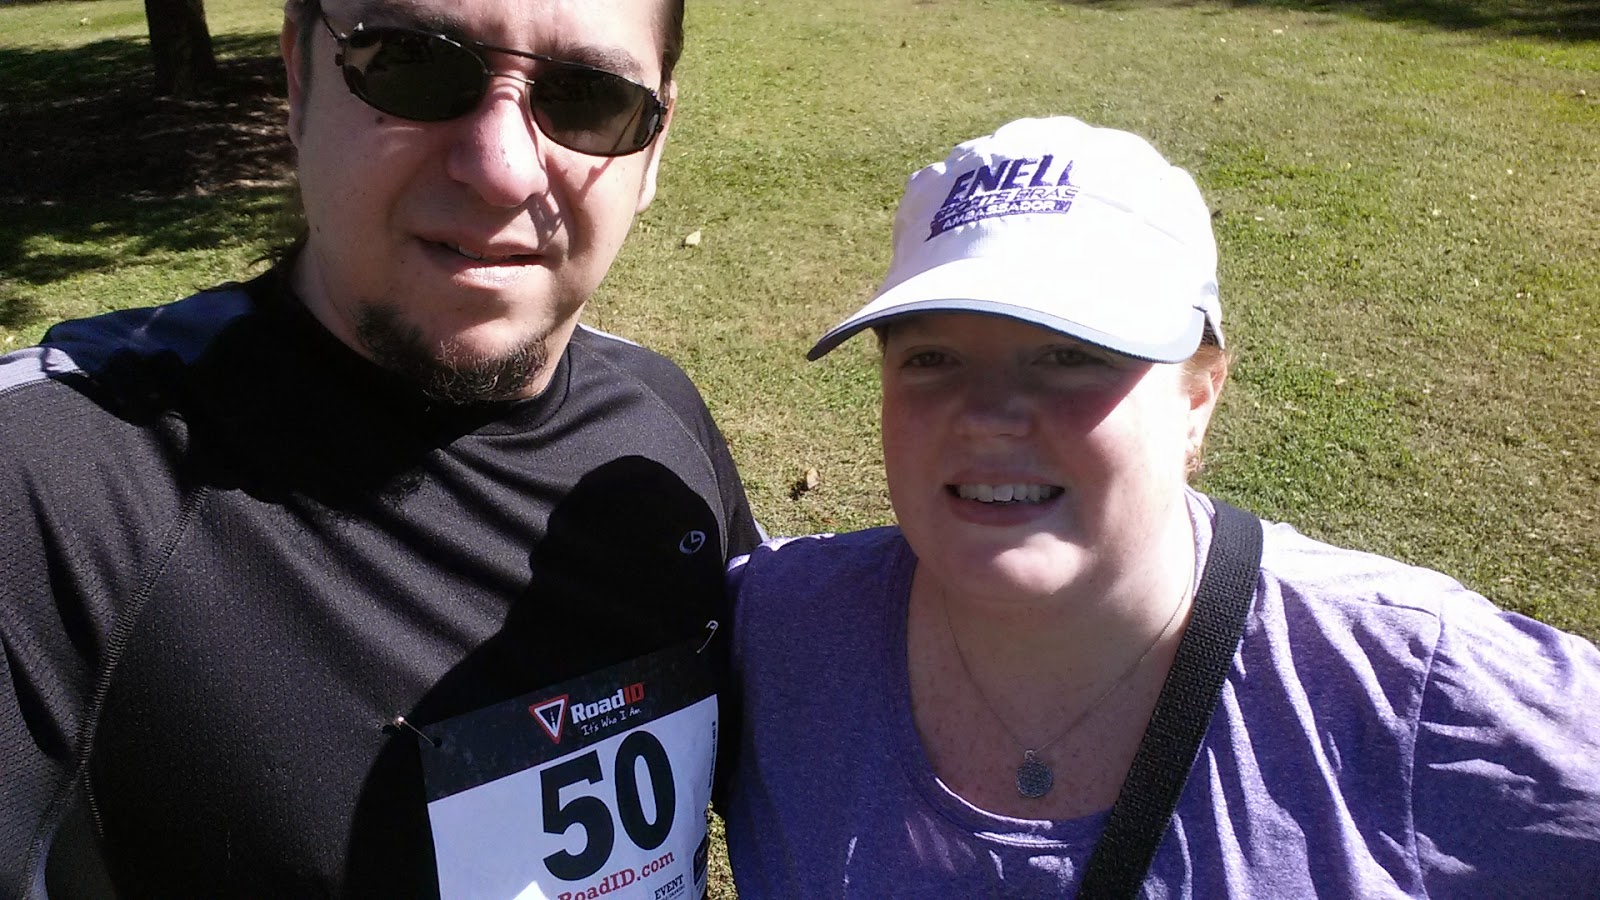

This month was also a milestone for us as Michael and I celebrated 10 years of marriage! It's gone by so fast, and it's fun to look back on the blog, because we had only been married 3 years when I started writing Ginger Lemon Girl... so we've grown along with this blog! 

It also marked a month of a huge change in our way of eating. I decided to start following a "whole-foods-plant-based-low-oil" eating plan. Basically the "McDougall Plan" if you're familiar with vegetarian/vegan doctor programs. Of course I follow the plan the best way I can with a gluten intolerance and a soy allergy, so I'm definitely not 100% McDougall, but very close. I decided with my Dad's medical history of heart problems and other health issues that it was time to make a permanent change. And somehow, it's been relatively easy. Much easier than I thought it would be. 

I also had a recent check up at my doctor's office and I had lost 11 pounds since my visit in late August and my blood pressure was the lowest it's ever tested in the past 10 years. My doctor said that I may even be able to go off one of my blood pressure medications very soon! So I feel very good about this dietary decision. I feel like I'm headed in the right direction to regain my overall health and I feel like I'm truly feeding my body well. I'm also incredibly thankful my husband is so supportive and willing to eat most of the "new" foods in our menu rotation! :-) 

I thought I'd share a sample of some of the things from our kitchen the past few weeks. Most don't have a specific recipe... just things I threw together to make a quick meal. I have not used any animal products in over a month and for my spiritual and religious beliefs...along with my health, it's just been a really great decision. 

 Rice chex with almond milk, sliced almonds, and blueberries... loaded cereal is always a favorite breakfast or snack! 


One of my favorite snacks right now is just plain 'ol drained & rinsed canned chickpeas (garbanzo beans). I could make them from scratch, but the canned variety from Harris Teeter is so easy! This snack is what seriously pulled me through the first week of being vegan. I think I probably ate at least 3 cans!


 In some ways after I had spend so much time and energy writing cookbooks the past few years I was "over" cooking and prep work. I just didn't want to do it anymore, it was major burnout... but changing my way of eating has given me a new energy in the kitchen and helped me to enjoy cooking again! This is the prep for kale & potato hash, one of my favorite breakfasts! Chopped potatoes, mushrooms, kale, green pepper, onions, and there's garlic in there somewhere!


The finished hash! I served it with salsa and half an avocado per serving. One of the keys to following a "McDougall" type plan is to eat as many whole-food, plant-foods as possible with no added oils. McDougall recommends that the fats in your diet come from whole food sources such as avocado, seeds, or nuts. I limit these foods because I'm trying to lose weight, but include one or two servings a week. 


A rare treat! I doubt these muffins were actually vegan or oil-free, but they WERE GLUTEN-FREE and this was from a meal out at Sweet Tomatoes in Raleigh, NC! Recently they have started offering a limited selection of gluten-free baked goods occasionally and these were gluten-free maple nut muffins. They were absolutely delicious and I was so impressed with Sweet Tomatoes offering a gluten-free baked good for those with celiac or gluten sensitivity.


My salad from our meal out at Sweet Tomatoes. It's amazing to me that I can enjoy a salad without eggs or cheese on it. I honestly never thought that was something I could do long term. But I feel SO GOOD with this way of eating, that I really don't miss the animal proteins at all. They even had gluten-free chilled brown rice pasta on the salad bar! This salad was early in my journey, so the dressing was not dairy-free (at least I don't think it was)... now I'm usually dressing salads with red wine vinegar, or apple cider vinegar, or a homemade tahini lemon dressing... and freshly ground salt & pepper.


 This was a "no-meat" loaf... in which Michael was seriously heavy-handed on the ketchup! haha! This recipe was from the Happy Herbivore cookbook, it was called "The Hippie Loaf" created for a friend who had celiac disease. We honestly were not big fans of this version of a no-meat loaf. I prefer this version that I tried several years ago... however, the mashed potatoes were made from yukon gold potatoes and simply mashed with Harris Teeter vegetable broth, a little nutritional yeast, and lots of added garlic and onion seasoning... we ate the entire pot. I love not feeling guilty about eating mashed potatoes!


For breakfast and sometimes lunch I often have veggie sandwiches loaded with hummus, sliced red peppers, sliced mushrooms, alfalfa sprouts, sliced tomatoes, sliced cooked potatoes, spinach, kale, etc... all put between two slices of gluten-free bread for me... it's filling, healthy, and is a perfect vegan "fast food" meal. McDougall recommends making your own hummus without any added oils and limited tahini (or no tahini)... because I live in the real world and I'm just trying to get through my 9-5 everyday, I use Food Lion's Taste of Inspirations types of hummus. They don't have a lot of added oil (and are definitely not swimming in it like some brands) and I use gluten-free bread from the store that does have egg whites. It's important to me to share this because while it doesn't follow the McDougall plan completely, it's close and it's still a very healthy way to eat and it works for my personal time limitations. I truly believe you have to make a plan work for you the best way you can. Otherwise, how will you stick with it? For these sandwiches, I try to slice & prep any ingredients and have them ready in the fridge for a quick meal anytime during the week. Hummus has become my mayonnaise and I LOVE slathering it on these sandwiches!


This was a meal I made a few nights ago and it would be a really great idea for the holidays. I had bought two medium-sized acorn squashes and I wanted to fill them with something other than rice (I've eaten a lot of rice! lol)... so I decided to make a stuffing with some of the gluten-free bread we had, chopped spinach, chopped & roasted chestnuts, celery, onions, sunflower seeds, and poultry seasoning. I used vegetable broth as the "binder" for the stuffing and this meal was THE BOMB! It would definitely be a great meal for the holidays, it tasted a lot like my favorite Thanksgiving stuffing, without feeling guilty about carb overload!


This was a comfort food night. I wanted something soupy with potatoes, so we made an easy succotash stew. Just peeled & boiled red potatoes and added a can of corn, tomatoes, and lima beans to the potatoes and cooking broth. I actually made this at my mother-in-law's house and everyone seemed to enjoy it for a late dinner that night.


Dinner out for our anniversary! I can't give up sushi, so I made the decision to have veggie sushi that night and it was delicious! I had two orders of avocado sushi, and one order of a veggie roll which included avocado, cucumbers, and two types of Japanese pickles. I was a very happy camper. This was a cornerstone meal to me because I really wanted to "cheat" and order my favorite Philly roll with smoked salmon and cream cheese... but I stuck to my plan and it worked and I felt great after our dinner. 


Along with the food changes, walking has become my favorite form of both meditation and exercise. I walk 4-5 days out of each week and it's easier on some days than others. But it's slowly becoming a habit I love and something I look forward too. At first I walked most mornings around 4:30am because my work schedule had changed and that forced me to get up earlier. However... as it's gotten colder in the mornings, I've gotten lazy and become a wimp... and now generally walk at the duck pond at work around 10am. Either way... it's happening and I'm glad! I love getting that daily dose of fresh air, stretching my legs, and having that time to be thankful and meditative for the day ahead.


And last but not least... PIZZA! And that's a vegan pizza no less! This is definitely a treat because it has Daiya vegan (and gluten-free and soy-free) cheese on it, and the crust has added oil, but I can't give up pizza out occasionally and I'm just thrilled I can still get it and enjoy it and not feel guilty about it. My favorite place to get pizza is Zpizza, but Mellow Mushroom now has a vegan, gluten-free crust available as well. To be MORE McDougall compliant, I can easily leave off the Daiya and just have a tomato sauce & veggie pizza. It dawned on me about 2 months ago that over the past year I had not ordered a pizza with meat. There have been many small changes in my eating along the way that have enabled this change to come at the right time. And apparently over the past year, I've preferred a veggie pizza every time! This must be why! :-) 


*********
And because I've been suck a slacker in my posting schedule, I thought I'd share some kitteh pictures with  you! Enjoy! 


Mollie in her favorite place lately, snuggled next to Michael in his chair.  


Max & Maya, lifelong snuggle buddies


 Max is not so much of a lapcat, but he will sit in the cat tree and stare at you intently for hours! It can be kind of creepy some days... lol!


 This is my mother-in-law's cat Tobie. He loves to sit in the fabric between her foot rest and chair when she's dozing in the living room! 


Charlie & Whiskey... these boys are bestest buddies and it's a rare day to find one not next to or on top of the other! 


Have a wonderful week! 


Pin It!

Wednesday, August 13, 2014

Jodi's Simple Vegetarian Antipasto Salad

photos by Jodi Hargreaves, used with permission.

Jodi decided to save the day here at Gingerlemongirl.com... I told her that my poor blog had been neglected the past few months and I needed some new recipes. SO she went home, made her current favorite lunch salad and took pictures. Sent them to me and said, "Here you go, I fixed it."

So here's Jodi's salad! We couldn't really figure out what to name it, but it's sort of an antipasto salad sans any meat... so it's vegetarian right? ;-)

Whatever it is... it's good!


I actually made my own version of the salad this week and used mini cucumbers and heirloom cherry tomatoes and that worked great too! However, I love the half-moon cucumbers in Jodi's salad!


And you really can't beat fresh mozzarella! Especially when it soaks up all the tomato, cucumber, and red wine vinegar goodness!


Jodi's salad is quite simply:
  • a chopped tomato (or halved cherry tomatoes)
  • black, seeded calamata olives
  • green olives with or without the stuffed pimento
  • half a cucumber, sliced (or 2 sliced mini cucumbers)
  • half a ball of fresh mozzarella, cubed 
  • sliced banana peppers (optional... I left these out! You can haz them Jodi!)
  • whole salad drizzled with balsamic vinegar or red wine vinegar 

That's it! Just mix it up, refrigerate and have for lunch! 

I used a fancy-schmancy smoked balsamic vinegar from The Olive Wagon in Raleigh, NC.  Use whatever your favorite red wine or balsamic vinegar is, use your favorite cheese, make up your own salad for a quick and easy weekday lunch! :-) Thanks for saving the day Jodes! :-)


Pin It!

Wednesday, May 14, 2014

Product Review: gardenlites™ Veggie Muffins


Last week I received a big box of gardenlites™ Veggie Muffins to try. I was sent five different varieties (was rather blown away by that! I was expecting maybe 1 box! lol), and Michael and I have tried two of them so far. Since they were individually packaged, we took them with us to work for snacks and/or for breakfast. ALL of the muffins are gluten-free, dairy-free, nut-free and soy-free, and are PACKED full of vegetables! What I really love (in addition to the allergen-free goodness) is that these muffins have 5 grams of fiber EACH, plus 3 grams of protein! 

They are low in sugar and the main ingredient in each muffin is a veggie! So far we have tried the Carrot Berry Muffins and the Blueberry Oat Muffins. Next on my list to try is the Zucchini Chocolate Veggie Muffins! The company doesn't necessary market the products as gluten-free, because they want them to be seen as a healthy baked item for all folks, not just the gluten-free crowd!  

To give you an example of the nutritional info (which you can also EASILY find on the gardenlites website - I love that!), here's what you'll find in the Carrot Berry Muffins, which are so far my favorite variety: 

Nutritional Info: 
  • Calories: 120 for one muffin
  • Total Fat: 2 grams
  • Cholesterol: 20 milligrams
  • Sodium: 250 milligrams
  • Total Carbohydrates: 24 grams
  • Dietary Fiber: 5 gram
  • Sugars: 11 grams
  • Protein: 3 grams

Ingredients (for the Carrot Berry Veggie Muffins):  
Carrot, Pasteurized Egg Whites, Pasteurized Whole Eggs, Evaporated Cane Juice, Brown Sugar, Soluble Corn Fiber, Corn Starch, Sorghum Flour, Brown Rice Flour, Canola Oil, Dried Cherries (cherries, rice flour), Dried Blueberries (blueberries, sugar, sunflower oil), Dried Cranberries (cranberries, rice flour, sugar, sunflower oil), Baking Powder (sodium acid pyrophosphate, sodium bicarbonate, corn starch, monocalcium phosphate), Potato Starch, Cinnamon, Salt, Vanilla Extract.

Other Current Flavors Include: 


Having these muffins in the freezer the past week has been a nice treat! When I needed a quick breakfast or snack, I grabbed one from the freezer. You can allow them to defrost on the counter or just pop them in the microwave for about 30 seconds to have a warm, "fresh-from-the-oven" tasting muffin!

I love that vegetables are the first ingredient in these gluten-free treats.  It can be pretty easy to incorporate fruits into other foods and baked goods, but vegetables can be a challenge. I think kids would really enjoy these muffins and they would be perfect for lunch boxes.

The muffins are quite moist and have a tender crumb. They are individually wrapped, which makes them very convenient. Also, for those concerned about the environment, they really don't have a lot of extra packaging which I really appreciated.
 
The gardenlites website is extremely consumer-friendly and easy to navigate and you can easily find where to purchase gardenlites products, along with ALL the ingredient and nutritional info for each product they carry (simply click on each product!). I really appreciate that they make it so easy for a consumer to find their information. I feel like when companies are proud of the products they carry, they are open and completely transparent about sharing their information.

These are muffins I would definitely purchase when they become available in my area!


GLG Disclosure: 
The product samples were sent to me by Gardenlites.com. to review on my blog if I CHOSE to do so. 
This is NOT a sponsored post and I did NOT receive monetary compensation. 
The opinions and photography in this post are completely my own.

Pin It!

Tuesday, May 13, 2014

Product Review: Cook Simple's Cowboy Chili Meal (Gluten-Free, Dairy-Free, Non-GMO)


I feel like I can hear the sound of the dinner bell at the chuckwagon ringing away with this review! I was first introduced to Cook Simple's Cowboy Chili last year when I received a box in a Taste Guru monthly box. I tried it and really enjoyed it. It was a simple healthy chili that could be made in about 20 minutes for a quick, healthy, and easily gluten-free dinner!

I've bought this boxed meal several times since, and I'm always amazed at the quality of the meal and how healthy it is for a boxed mix. The box comes with directions on the pack and a packaged mix of dried beans, spices, and vegetables. You add a can of diced tomatoes, 1 pound browned ground beef, and 2 1/2 cups of water and voila... dinner 20-30 minutes later! You could easily make it vegetarian by using another can of beans or garbanzos in place of the ground beef (I actually added some leftover garbanzo beans I had in the fridge last night!), and it's already dairy-free... which is rare option for packaged gluten-free foods.

And because I'm sensitive to a lot of tomatoes (I can handle small amounts) I actually use canned pumpkin puree or sweet potato puree instead of the tomatoes... you can't tell the difference! (And bonus fiber! woohoo!) As you will see below, for such a great tasting dish the ingredient list is very small and mainly consists of dried vegetables and beans!

Nutritional Info: 
  • Calories: 140 per serving (as packaged, with 1/4 pound 85% lean ground beef = 384 cals total)
  • Total Fat: 0 grams (as packaged, with additional 1/4 pound 85% lean ground beef = 17 grams total)
  • Cholesterol: 0 milligrams (as packaged, with additional 1/4 pound 85% lean ground beef = 77 milligrams total)
  • Sodium: 85 milligrams (as packaged, with additional 1/4 pound 85% lean ground beef = 160 milligrams total)
  • Total Carbohydrates: 20 grams
  • Dietary Fiber: 1 gram
  • Sugars: 11 grams
  • Protein: 1 gram (as packaged, with additional 1/4 pound 85% lean ground beef = 22 grams total)

Ingredients:  

Red Beans*, Quinoa, Black Beans*, Tomato*, Onion*, Peppers*, Zucchini*, Chili Powder (chili peppers*, salt, spices, garlic*), Sea Salt, Spices, Spinach* 

* = Dried  (from Cooksimple.com)


Pin It!

Monday, May 12, 2014

A Perfect Cup of Tea: How to Brew Loose Tea Leaves and Blends


When I was a kid I hated coffee and tea. Couldn't stand it. I didn't even like the smell! Over the past few years though, I've become a fan. I would say I'm a "seasonal" tea drinker! I tend to veer towards coffee in the in the fall and winter and tea in the spring and summer.

Last week I received a wonderful gift in the mail from my friend Jodi who lives in Vero Beach, FL. She sent me 4 samples of tea from her favorite local tea shop: Tea and Chi. Several years ago I found a little black, cast iron Chinese tea pot (similar to this one) and it's been my favorite vessel for brewing loose tea leaves. However, I don't have any local tea shops close by to purchase fresh, whole tea leaves and blends. So Jodi's package was a very welcome surprise!

And Jodi just so happened to find a blend she thought I'd absolutely love...


Well she was right! (Along with being a lemon & ginger tea blend...:-) Rooibos is a red tea that is naturally decaffeinated so it's perfect for a cup of hot tea in the evening. The same night Jodi's package came, I dug through the kitchen cabinets to find my Chinese tea pot and and I made a pot of tea.

I love the packaging that Tea and Chi places on their bags of whole tea leaves and blends. They tell you the type of tea you have, how much dry tea to use per cup, how long to brew it, what ideal temperature to brew it at, and then if it contains caffeine or not.  Brilliant, my friends. Just brilliant!

Now I'll be perfectly honest, I didn't take the temperature of my boiling water. However, I did only let my water just come to a rolling boil before pouring it over the tea leaves.


My particular pot came with a mesh metal strainer. You simply place 1-3 teaspoon of dried whole tea leaves and pour the hot water over it. Allow it to brew for several minutes as directed on your package. For the Lemon Ginger Rooibos, allow it to brew for 4-6 minutes.


I measured out 2 cups of hot water after it boiled to make sure I had the correct ratio of water to tea leaves. Then I poured it over the tea. Easy as that.


And voila... 4-6 minutes later, lovely warm fresh brewed hot rooibos tea. I prefer tea with plain ol' sugar. Sometimes honey, but honestly I just like sugar in my tea. Sometimes with green tea, I prefer it with no sugar at all. I generally use about 2-3 teaspoons of sugar in a large mug of tea (about 16 ounces). I don't want it syrupy sweet, just sweet enough to taste.

Jodi also spent the past few months creating this gorgeous throw for me! I LOVE a long throw, a cup of hot tea and a good book! Thank you so much Jodi! 

So far, from the batch that Jodi sent, I have tried the Lemon Ginger Rooibos, the Magnolia Oolong, and the Florida Sunshine Rooibos. The Florida Sunshine smells amazing when you brew it! It has just a hint of citrus, and the scent when you open the tea package is refreshing!  I've used the Magnolia Oolong for an iced tea, and while I'm generally not a fan of things that taste very floral, this tea is so delicately floral and fresh that I've really enjoyed it! I've brewed the tea fresh, added a little sugar, stirred it until it melted into the tea and then poured it over ice. Really delicious!


Another great thing about freshly brewed, whole tea leaves like this is that you can often reuse them at least 2-3 times. The green tea leaves below are Magnolia Oolong. I've used this batch of tea twice so far, and I'll probably use it at least one more time before adding the leaves to our compost pile in the back yard.

You can keep wet tea leaves in the fridge for up to 2 days, or you can just allow them to air dry on a paper towel on the counter and use them 2-3 times (allowing them to dry between uses.)

There's just something relaxing and therapeutic about making fresh tea from real, whole tea leaves! Thank you so much for such a thoughtful gift Jodi! I plan on trying the Five Peak Green Jade tomorrow.


Do you like to use fresh dried tea leaves? 
Do you have a favorite tea shop that you go too? 

Pin It!

Wednesday, May 7, 2014

New Gluten-Free Products at ALDI Grocery Stores


I first visited an ALDI grocery store after I had graduated from college and was living in my tiny little first apartment. It was perfect for me because I was BROKE and I needed affordable groceries. I lived off canned and boxed foods at the time and ALDI was a perfect fit. Tons of cans of vegetables for less than .40 a can, I made a lot of vegetable soups and had lots of canned fruits along with rice, pasta, and even fresh veggies for incredibly good prices. ALDI was a lifesaver for me, especially when my budget incredibly limited before I was married.

I stopped frequently shopping at ALDI when I went gluten-free in 2007 mainly because they didn't offer many gluten-free items other than naturally gluten-free foods.

HOWEVER, I found out this week that for a LIMITED time ALDI will now be selling an incredibly diverse line of gluten-free products. The supply is limited and you should probably run out and grab these items before they are gone. IF you really enjoy the products, PLEASE PLEASE PLEASE go to ALDI'S website and leave them a message saying you'd LOVE to have these products available ALL the time. I get the feeling that many of these products are name brands we pay big bucks for in a regular grocery store.

Over the next two weeks I hope to test out these products I picked up on Monday night to let you know what I think of them and how they worked out. If you try any of the products I didn't pick up (like the dessert baking mixes or the frozen products, I'd LOVE to know what you think of them! PLEASE send me an email or a comment on this post to let me know what you tried and what you thought of it!

THE BEST thing about these great products SO FAR, quite simply is the GREAT prices (and the fact, I'm pretty sure they are name-brand items just re-branded by ALDI.) Below I've listed what I paid for each product. These products are at least half the price if not 1/3 less expensive than what you would pay in any other grocery store for gluten-free products.

Gluten-Free Penne Pasta (like Heartland brand) $1.29 (10-12 servings) for 16 ounces

Gluten-Free Multigrain Snack Crackers (like Crunchmaster) for $1.49 for 4.25 ounces

Gluten-Free Pizza Crust Mix for $2.99 for 16.5 ounces (makes 1 large pizza)


Gluten-Free Baking Mix (like Gluten-Free Bisquick) for $2.99 for 16 ounces

Gluten-Free Rice Pasta & Cheddar Cheese Mix (Like Kraft Mac & Cheese) for $1.49 for 6 ounces

Gluten-Free Rosemary & Olive Oil Multigrain Snack Crackers (like CRUNCHMASTER brand) for $1.49 for 4.25 ounces


GLG Disclosure: 
I purchased these gluten-free products from ALDI on my own dime because I wanted to try them out. I was not compensated or given free product by ALDI grocery stores or asked to do a review.  
The opinions and photography in this post are completely my own.

Pin It!

Friday, April 18, 2014

Slow Cooker Chicken Provence with Red Potatoes


 I still love my slow cooker! Especially this time of year, when life is busy and you don't want to be inside all afternoon. The days are getting warmer, the sunlight lasts longer and you want to enjoy every minute of it.

This is a recipe I threw together the other day with ingredients I had on hand. Defrosted bone-in chicken thighs, and a big five pound bag of large red potatoes.

One way I love to fix potatoes with any protein in the slow cooker, is to simply place the potatoes in the bottom of the slow cooker whole. The potatoes will then sort of act like a rack to hold the protein up. it's great because the protein will actually roast and turn golden brown, especially if you have a little fat on the protein that will get crispy over the long cooking period.  The potatoes will then cook in the savory juices from the meat along with any additional ingredients you add.


This one's super easy and super versatile. Don't have Herbs de Provence? Try it with your favorite seasoning blend instead! It would be delicious with Victoria's Gourmet Tuscan Blend, Chili Cinnamon Rub, or even the Ginger Citrus blend! Victoria's Gourmet sent me a huge package of seasoning blends several years ago and I still use them nearly every day! Check out my favorite way to store the small seasoning tins!

Slow Cooker Chicken Provence with Red Potatoes
free of gluten, dairy, soy, and grains
created by Carrie Forbes of Gingerlemongirl.com
printer-friendly version

Ingredients:
  • 4 bone-in chicken thighs (about 1 1/2 pounds)
  • 5 medium size red potatoes (enough to fit the bottom of a 4 quart oval slow cooker)
  • 1/3 cup white wine or cider vinegar
  • 2-3 tablespoons good olive oil
  • 1 tablespoon herbs de provence seasoning blend (McCormick's Gourmet is a great brand too, look for it in the spice aisle of your grocery store)
  • freshly ground salt & pepper, to taste
  • Optional: 2-3 tablespoons freshly squeezed lemon or lime juice for serving
Directions: 
  1. Place (washed & patted dry) whole red potatoes in the bottom of a 4-quart slow cooker. (You can easily double this recipe if you have a larger 6-quart slow cooker!) 
  2. Place the chicken thighs on top of the potatoes. Drizzle the white wine over the potatoes followed by the olive oil. 
  3. Sprinkle the herbs de provence and the ground salt & pepper evenly over the chicken. Place the lid on the slow cooker and cook on low for 8-10 hours, or on high for 4-5 hours. 
  4. Serve 1 chicken thigh per person with a quartered red potato. Make sure to ladle some of the juices from the bottom of the slow cooker over the chicken and potatoes, it's delicious! To brighten the dish just before serving squeeze some fresh lemon juice or lime juice over each plate. Serve with a fresh salad on the side. 

Carrie's Kitchen Notes: 
  •  If you have any leftover chicken and potatoes, remove the chicken from the bone and cut into small pieces, dice up the potatoes and mix with the juices in the bottom of the slow cooker for a chicken & potato stew. You can add cooked green beans and carrots to make a more complete meal. 
  • I prefer bone-in chicken because it has more flavor and it will withstand long cooking times in the slow cooker without falling apart or losing texture. 
  • You can use any type of potatoes you'd like in this dish. Red potatoes worked great, but it would be delicious with yellow, white, or purple potatoes too! 
  • You can also add a few heirloom tomatoes chopped up to the slow cooker before cooking for extra flavor. 


Pin It!

Wednesday, March 26, 2014

Light and Fluffy Gluten-Free Pancakes (and a Vegan recipe too!)


Ahhhh pancakes. One of my absolute favorite foods. You know I go through these stages. It might be muffins one month, pizza the next... the past two months? It's been pancakes. I started playing around with ratios back in December or January when I was experimenting with gluten-free sourdough bread. I found the recipe over at "The Art of Gluten-Free Baking" and I was able to make a really good starter that made loaf after loaf of sourdough bread! It was wonderful! Until..... my starter died. Well it didn't die, it started to smell funky and when I tossed it and tried again (and again, and AGAIN...) I never was able to replicate that first starter. I'll try again soon... but I decided maybe it wasn't the right season for sourdough!

So how does this have anything to do with pancakes? I started thinking more about baking ratios. For the first time in months I started feeling creative in the kitchen again and I wanted to play! I know, I know... I'm a little late to the game. I've fought the use of kitchen scales for years because I don't think it's the easiest way to bake in the US. I grew up using cups & teaspoons, my grandmother cooked with cups and teaspoons and her mother before her... why change?


Consistency. Plain and simple. Most often if you follow a ratio, you get good results. And when you're gluten-free and ingredients cost 5x more than "regular" ingredients... you WANT good results. And it just so happened that Michael Ruhlman did too. I read his post on pancake ratios and I was intrigued. I knew I'd have to play around with the additional ingredients to make good gluten-free pancakes... but I bet this would work!

The basic ratio for pancakes is: 
2 parts liquid : 1 part egg : 1/2 part butter : 2 parts flour


Of course you add additional items like a leavener to help the pancakes rise, but basically this is how you create a recipe for pancakes. So.... I made gluten-free pancakes. I made LOTS of gluten-free pancakes! They were so good we had them for dinner twice, and for breakfast the past few weekends... until... (since we're budgeting our money very carefully) I was out of eggs... and butter...


Can you even MAKE good pancakes without eggs or butter?? I wasn't sure to be honest. I had tried them in the past when I was on a vegan diet and I probably tried making them a dozen times and they were each an epic failure.... except then I wasn't using ratios...

Would it still work using ratios?


You betcha! Those pancakes right above here? Yep those! Those are vegan gluten-free pancakes. The very first picture is this post is of the gluten-free vegan pancakes as well! They are THAT tall and fluffy!

Now there are a few catches... I have a sneaking suspicion these pancakes WILL work with different types of gluten-free flours, BUT I have not tried different variations (other than those I list below)... SO if you happen to be allergic to almonds or nuts and can't use almond flour, I do not know what a good substitute would be... however, if you try another flour make sure to use the correct ratio/amount of flour so that the batter will have the same consistency. Also, I did use a scale to get my measurements, but I've also included cup measurements as well. However, be aware that different flours have different weights, so if you use different flours, you need to measure them to get the same weight as the flours I used below.

Light & Fluffy Gluten-Free Pancakes (see vegan version below)
free of gluten and soy
adapted by Carrie of Gingerlemongirl.com
makes 9-10 pancakes
printer-friendly version

Dry Ingredients:
  • 8 ounces gluten-free flour (I use about 3/4 cup brown rice flour, 3/4 cup blanched almond flour, and 1/3 cup arrowroot starch) 
  • 2 tablespoons sugar
  • 2 teaspoons baking powder
  • 1 teaspoon salt
  • 1/4 teaspoon xanthan gum (optional, I think they would work fine without it!
Wet Ingredients:
  • 8 ounces milk or non-dairy milk (I use about 1 cup almond milk)
  • 2 large eggs
  • 4 tablespoons butter (or ghee), melted
  • 1 teaspoon pure vanilla extract
Directions: 
  1. Preheat griddle as directed or place a large heavy-bottomed (well-seasoned cast iron) skillet on the stove. 
  2. In a large bowl whisk together all dry ingredients. Make a well in the center of the dry ingredients and add the wet ingredients. Stir together well to create a thick batter. Allow batter to rest 5-10 minutes before using (can also be made the night before and placed in the refrigerator to make the next morning.)
  3. On the preheated griddle or greased, heated cast iron skillet drop batter 2-3 tablespoons at a time to make 2-3" pancakes. Cook each pancake for about 2 minutes on medium-high heat. When the pancake has cooked through on one side, the edges will appear dry and you will see bubbles come up through the batter and pop when the first side is done. Flip pancake and cook an additional 1-2 minutes until the underside is golden brown. Serve pancakes hot with butter and pure maple syrup or molasses. 


Light & Fluffy VEGAN Gluten-Free Pancakes
free of gluten, dairy, eggs, soy, and animal products
adapted by Carrie of Gingerlemongirl.com
makes 9-10 pancakes
printer-friendly version

Dry Ingredients:
  • 8 ounces gluten-free flour (I use about 3/4 cup brown rice flour, 3/4 cup blanched almond flour, and 1/3 cup arrowroot starch) 
  • 2 tablespoons sugar
  • 3 teaspoons (1 tablespoon) baking powder
  • 1 teaspoon salt
  • 1/4 teaspoon xanthan gum (optional, I think they would work fine without it!
Wet Ingredients:
  • 8 ounces non-dairy milk (I use about 1 cup almond milk)
  • 1/2 cup unsweetened applesauce or pure pumpkin puree
  • 4 tablespoons light tasting olive oil
  • 1 teaspoon pure vanilla extract
Directions: 
  1. Preheat griddle as directed or place a large heavy-bottomed (well-seasoned cast iron) skillet on the stove. 
  2. In a large bowl whisk together all dry ingredients. Make a well in the center of the dry ingredients and add the wet ingredients. Stir together well to create a thick batter. Allow batter to rest 5-10 minutes before using (can also be made the night before and placed in the refrigerator to make the next morning.)
  3. On the preheated griddle or greased, heated cast iron skillet drop batter 2-3 tablespoons at a time to make 2-3" pancakes. Cook each pancake for about 2 minutes on medium-high heat. When the pancake has cooked through on one side, the edges will appear dry and you will see bubbles come up through the batter and pop when the first side is done. NOTE that vegan pancakes will seem a bit more fragile when flipping than non-vegan pancakes do, they will still be okay! Flip pancake and cook an additional 1-2 minutes until the underside is golden brown. Serve pancakes hot with pure maple syrup or molasses. 
Pin It!