Showing posts with label egg free. Show all posts

Wednesday, August 13, 2014

Jodi's Simple Vegetarian Antipasto Salad

photos by Jodi Hargreaves, used with permission.

Jodi decided to save the day here at Gingerlemongirl.com... I told her that my poor blog had been neglected the past few months and I needed some new recipes. SO she went home, made her current favorite lunch salad and took pictures. Sent them to me and said, "Here you go, I fixed it."

So here's Jodi's salad! We couldn't really figure out what to name it, but it's sort of an antipasto salad sans any meat... so it's vegetarian right? ;-)

Whatever it is... it's good!


I actually made my own version of the salad this week and used mini cucumbers and heirloom cherry tomatoes and that worked great too! However, I love the half-moon cucumbers in Jodi's salad!


And you really can't beat fresh mozzarella! Especially when it soaks up all the tomato, cucumber, and red wine vinegar goodness!


Jodi's salad is quite simply:
  • a chopped tomato (or halved cherry tomatoes)
  • black, seeded calamata olives
  • green olives with or without the stuffed pimento
  • half a cucumber, sliced (or 2 sliced mini cucumbers)
  • half a ball of fresh mozzarella, cubed 
  • sliced banana peppers (optional... I left these out! You can haz them Jodi!)
  • whole salad drizzled with balsamic vinegar or red wine vinegar 

That's it! Just mix it up, refrigerate and have for lunch! 

I used a fancy-schmancy smoked balsamic vinegar from The Olive Wagon in Raleigh, NC.  Use whatever your favorite red wine or balsamic vinegar is, use your favorite cheese, make up your own salad for a quick and easy weekday lunch! :-) Thanks for saving the day Jodes! :-)


Pin It!

Wednesday, March 26, 2014

Light and Fluffy Gluten-Free Pancakes (and a Vegan recipe too!)


Ahhhh pancakes. One of my absolute favorite foods. You know I go through these stages. It might be muffins one month, pizza the next... the past two months? It's been pancakes. I started playing around with ratios back in December or January when I was experimenting with gluten-free sourdough bread. I found the recipe over at "The Art of Gluten-Free Baking" and I was able to make a really good starter that made loaf after loaf of sourdough bread! It was wonderful! Until..... my starter died. Well it didn't die, it started to smell funky and when I tossed it and tried again (and again, and AGAIN...) I never was able to replicate that first starter. I'll try again soon... but I decided maybe it wasn't the right season for sourdough!

So how does this have anything to do with pancakes? I started thinking more about baking ratios. For the first time in months I started feeling creative in the kitchen again and I wanted to play! I know, I know... I'm a little late to the game. I've fought the use of kitchen scales for years because I don't think it's the easiest way to bake in the US. I grew up using cups & teaspoons, my grandmother cooked with cups and teaspoons and her mother before her... why change?


Consistency. Plain and simple. Most often if you follow a ratio, you get good results. And when you're gluten-free and ingredients cost 5x more than "regular" ingredients... you WANT good results. And it just so happened that Michael Ruhlman did too. I read his post on pancake ratios and I was intrigued. I knew I'd have to play around with the additional ingredients to make good gluten-free pancakes... but I bet this would work!

The basic ratio for pancakes is: 
2 parts liquid : 1 part egg : 1/2 part butter : 2 parts flour


Of course you add additional items like a leavener to help the pancakes rise, but basically this is how you create a recipe for pancakes. So.... I made gluten-free pancakes. I made LOTS of gluten-free pancakes! They were so good we had them for dinner twice, and for breakfast the past few weekends... until... (since we're budgeting our money very carefully) I was out of eggs... and butter...


Can you even MAKE good pancakes without eggs or butter?? I wasn't sure to be honest. I had tried them in the past when I was on a vegan diet and I probably tried making them a dozen times and they were each an epic failure.... except then I wasn't using ratios...

Would it still work using ratios?


You betcha! Those pancakes right above here? Yep those! Those are vegan gluten-free pancakes. The very first picture is this post is of the gluten-free vegan pancakes as well! They are THAT tall and fluffy!

Now there are a few catches... I have a sneaking suspicion these pancakes WILL work with different types of gluten-free flours, BUT I have not tried different variations (other than those I list below)... SO if you happen to be allergic to almonds or nuts and can't use almond flour, I do not know what a good substitute would be... however, if you try another flour make sure to use the correct ratio/amount of flour so that the batter will have the same consistency. Also, I did use a scale to get my measurements, but I've also included cup measurements as well. However, be aware that different flours have different weights, so if you use different flours, you need to measure them to get the same weight as the flours I used below.

Light & Fluffy Gluten-Free Pancakes (see vegan version below)
free of gluten and soy
adapted by Carrie of Gingerlemongirl.com
makes 9-10 pancakes
printer-friendly version

Dry Ingredients:
  • 8 ounces gluten-free flour (I use about 3/4 cup brown rice flour, 3/4 cup blanched almond flour, and 1/3 cup arrowroot starch) 
  • 2 tablespoons sugar
  • 2 teaspoons baking powder
  • 1 teaspoon salt
  • 1/4 teaspoon xanthan gum (optional, I think they would work fine without it!
Wet Ingredients:
  • 8 ounces milk or non-dairy milk (I use about 1 cup almond milk)
  • 2 large eggs
  • 4 tablespoons butter (or ghee), melted
  • 1 teaspoon pure vanilla extract
Directions: 
  1. Preheat griddle as directed or place a large heavy-bottomed (well-seasoned cast iron) skillet on the stove. 
  2. In a large bowl whisk together all dry ingredients. Make a well in the center of the dry ingredients and add the wet ingredients. Stir together well to create a thick batter. Allow batter to rest 5-10 minutes before using (can also be made the night before and placed in the refrigerator to make the next morning.)
  3. On the preheated griddle or greased, heated cast iron skillet drop batter 2-3 tablespoons at a time to make 2-3" pancakes. Cook each pancake for about 2 minutes on medium-high heat. When the pancake has cooked through on one side, the edges will appear dry and you will see bubbles come up through the batter and pop when the first side is done. Flip pancake and cook an additional 1-2 minutes until the underside is golden brown. Serve pancakes hot with butter and pure maple syrup or molasses. 


Light & Fluffy VEGAN Gluten-Free Pancakes
free of gluten, dairy, eggs, soy, and animal products
adapted by Carrie of Gingerlemongirl.com
makes 9-10 pancakes
printer-friendly version

Dry Ingredients:
  • 8 ounces gluten-free flour (I use about 3/4 cup brown rice flour, 3/4 cup blanched almond flour, and 1/3 cup arrowroot starch) 
  • 2 tablespoons sugar
  • 3 teaspoons (1 tablespoon) baking powder
  • 1 teaspoon salt
  • 1/4 teaspoon xanthan gum (optional, I think they would work fine without it!
Wet Ingredients:
  • 8 ounces non-dairy milk (I use about 1 cup almond milk)
  • 1/2 cup unsweetened applesauce or pure pumpkin puree
  • 4 tablespoons light tasting olive oil
  • 1 teaspoon pure vanilla extract
Directions: 
  1. Preheat griddle as directed or place a large heavy-bottomed (well-seasoned cast iron) skillet on the stove. 
  2. In a large bowl whisk together all dry ingredients. Make a well in the center of the dry ingredients and add the wet ingredients. Stir together well to create a thick batter. Allow batter to rest 5-10 minutes before using (can also be made the night before and placed in the refrigerator to make the next morning.)
  3. On the preheated griddle or greased, heated cast iron skillet drop batter 2-3 tablespoons at a time to make 2-3" pancakes. Cook each pancake for about 2 minutes on medium-high heat. When the pancake has cooked through on one side, the edges will appear dry and you will see bubbles come up through the batter and pop when the first side is done. NOTE that vegan pancakes will seem a bit more fragile when flipping than non-vegan pancakes do, they will still be okay! Flip pancake and cook an additional 1-2 minutes until the underside is golden brown. Serve pancakes hot with pure maple syrup or molasses. 
Pin It!

Wednesday, August 29, 2012

Book Review: The Essential Gluten-Free Baking Guide, Part 2


Title: The Essential Gluten-Free Baking Guide, Part 2
Authors: Iris Higgins and Brittany Angell
Publisher: Triumph Dining, Inc.,
Copyright: 2012

Earlier this year a dear friend of mine, Iris Higgins the author of the website "The Daily Dietribe" asked me if I would like to try a few recipes from one of her new books, "The Essential Gluten-Free Baking Guide, Part 2." I was delighted. Iris is a registered hypnotherapist with a master's degree in psychology and is working on her second master's in nutrition.

Iris is also a passionate writer with a love of living holistically. Adding to her list of accomplishments, Iris also has a private wellness coaching practice in which she helps women to have a healthy relationship with food, with their bodies, and with their emotional, physical, and spiritual health.


And on top of ALL of that? Iris somehow finds the time to create recipes of all sorts! Iris' new cookbooks are published by Triumph Dining. They are entitled, "The Essential Gluten-Free Baking Guides Part 1 and Part 2." Iris along with her co-writer and co-recipe developer Brittany Angell (author of Real Sustenance) studied and experimented with 12 different gluten-free flours to learn about their properties and how they worked best. Then they both worked tirelessly to develop a number of recipes for each gluten-free flour.


One of the recipes I have tried so far are her basic Brownies. The brownies are very simple and are made with a new gluten-free flour called cassava flour. Cassava flour is made from the same plant as tapioca starch.  I made the brownies in a round glass pie pan for dessert one night last week. WE LOVED them! My inlaws had no idea they were gluten-free! They were gooey and rich and super crispy on the outside. The brownies were perfect with coconut milk ice-cream! 


The next recipe I tried from Iris' book was her Yeast-Free, Vegan Sandwich Bread.

This bread is simply amazing. I truly don't know how else to describe it. I have tried for YEARS to create a yeast-free bread that tastes like a normal sandwich bread. A yeast-free bread that doesn't crumble when it's cut, that is sturdy, yet pliable. That just tastes like good sandwich bread...and Iris' recipe nails it, plain and simple.

I have several friends who cannot tolerate yeast and I love baking egg-free (mostly because it's cheaper) so personally to me, this recipe alone is worth the cost of the book!!


This recipe uses sorghum flour, teff flour, and potato starch. It is a super light, fluffy bread and it contains a secret ingredient to give it structure and a texture that is incredibly similar to yeast bread.

It's seriously easy to make and I think this bread is my new weekly sandwich bread. I love that it doesn't use eggs and it's a high fiber, "normal" sized loaf of bread.

The cookbook is not only chock full of great recipes, but also handy baking tips, interviews with gluten-free baking experts, research on gluten-free flours, etc...

Basically this book along with the first, are both THE ESSENTIAL books you need to learn about the most useful gluten-free flours and the best ways to incorporate them into your everyday baking. There aren't many books that I would recommend to people who are learning how to bake gluten-free... but these books? Get them. Use them. And have a whole lot more fun baking gluten-free!

Iris...you're a genius girl. Simply genius! And those pastry tarts... I'm so making those next!

Pin It!

Tuesday, May 22, 2012

Make It Gluten Free Tuesdays: Quick Broccoli Casserole Recipe


I don't know about you... but what you see above? That's my favorite kinda recipe. That's Michael's Aunt Terri's Quick Broccoli Casserole. It's FAMOUS at our holiday meals and family reunions. I love hand-written recipes shared with friends and family. It's kind of rare now-a-days. A lost art of sorts. I love this recipe because it's very similar to one my great-grandmother used to make as well. She loved Cheez Whiz (which believe it or not IS gluten free!) and cream of chicken soup. I mean really... whose mom DIDN'T love "already-prepared-casserole-super-star", cream of chicken soup?

Admittedly, I enjoy just having recipes like this... reading them... treasuring the love which went into sharing them more than I do actually making these recipes (which use super processed products)... AND I think they are still super fun to share. And for the food nazis (just to be clear)... I am NOT suggesting you go out and fill your pantries with processed franken-food -- I'm just sharing with you how to change those favorite recipes IF you would like to do so! See how easy that is? No need to rant and rave. 

And I can't tell you how often I get an email asking something along the lines of... "So my grandmother used to make this recipe with so-and-so, and so-and-so... how in the WORLD can I re-create that gluten free?" So I thought it would be a fun series on this blog to share hand-written recipes I have from my grandmother, my great-grandma P., and various friends and neighbors and tell you how I would make them gluten free. Sound like a plan?

Would you like to join me? I'd like to make this a weekly link up series. You can share how you would make a recipe healthier, how to make it gluten free, dairy free, egg free, allergen free... etc... I love seeing these old recipes and I love figuring out how to make them new again!

So here's how I would make this recipe gluten free:

Aunt Terri's Quick Broccoli Casserole
revised to be gluten free (with dairy-free options)
printer-friendly version

Ingredients:
1 small onion, diced (about 1/2 cup)
1/3 cup green pepper, finely diced
2 tablespoons butter (or olive oil for dairy free)
1 recipe gluten free cream of chicken soup
3/4 cup COOKED rice
1 small (8 oz.) jar Cheez Whiz (if you're dairy free, check out this homemade dairy-free cheeze sauce instead)
1 small (5 oz.) can evaporated milk (if you're dairy free, try using full-fat coconut milk)
2 (10 oz.) packages frozen chopped broccoli

Directions:
Preheat oven to 325 degrees. Saute onion & green pepper in butter in a hot skillet. Stir in cooked rice, Cheez Whiz, milk, and soup. Stir continuously until cheez whiz is melted. Thaw broccoli and drain any liquid. Add drained broccoli to a greased 2 quart casserole dish. Pour sauce evenly over the broccoli. Bake at 325 degrees for 30 minutes until hot & bubbly. Yields 6 servings.


Now if you'd like a healthier version of gluten free broccoli casserole? 
Here are great options:


***********************

Now it's your turn!
Do you have a favorite family recipe that you re-created to be gluten free? It can be a new post, an old post, a post you've edited! Just link back to my page to be included! That's it!


Pin It!

Monday, May 14, 2012

Seriously Easy Gluten Free, Vegan Pizza Crust Recipe

GF, vegan, gum-free pizza dough just pressed out.

Sometimes you just come up with a recipe that works the first time and you have to share!! This was one of those recipes. Ever since The (Not-So) Gluten Free Pizza Crust Debate (awesome article Alta!) regarding Domino's pizza started last week... I've been a little obsessed with pizza. Honesty, I don't make a lot of pizza. A lot gluten free pizza recipes I've tried over the years are a bit complicated and have a lot of ingredients... and these days I just don't have time for complicated. 

If it's got more than 5 ingredients, I just haven't been too interested in trying it lately. So after hearing about Domino's gluten free crust, trying Domino's gluten free crust and then being sick for two full days from the "gluten free crust" (yep... I got sick), I decided no more Domino's. 

I needed a recipe for QUICK pizza at home. I personally cannot use corn tortillas as a base because corn doesn't agree with me. So what else could I use... 

Hubs had regular cheese, I had daiya cheese.

I started remembering recipes for quick pizzas I had seen lately: Alta's Easy Quinoa Pizza, Socca Pizza, Gluten Free Day's Quinoa Pizza, Almond Flour Pizza, etc... I liked different aspects of each of these pizzas... but I wanted something super easy I could put together in just a few minutes. 

This weekend my gluten free support group had our May meeting. We had a meeting geared towards kids so we made pizza! GalloLea Organics of Asheville, NC sent me samples of their amazing pizza crust kits. I was so intrigued with their gluten free crust mix. All you had to do was mix the dry ingredients with water, pat out on a pan and bake. That's what I wanted to do. (PS... if you want an awesome pizza crust kit that you don't have to make and that you can keep in the pantry, BUY the GalloLea Organics kits! We LOVED those pizzas!) 

Par-baked crust! It's darker due to the teff & quinoa flours.

I wanted to use quinoa flour for the pizza because it's very high in both protein and fiber. Quinoa is also slightly lower in carbohydrates than other gluten free flour options, so it's a better option for my pizza cravings! I thought I had a bag of quinoa flour in the pantry, but realized all I had was regular quinoa. So I used my vitamix! I love my vitamix... I added the quinoa in small batches to the vitamix and ground it into flour. It worked perfectly! To make the pizza completely grain free (as quinoa is technically a seed) use all quinoa flour or add almond flour in place of the teff.

Easy Gluten Free, Vegan Pizza Crust Recipe
free of gluten, soy, dairy/casein, gums, eggs
adapted from Gluten Free Day's Quinoa Pizza
printer-friendly version
makes one 12" thin-crust pizza

Ingredients: 
3/4 cup quinoa flour
1/4 cup teff flour
1/4 teaspoon sea salt
1 teaspoon rapid rise or bread machine yeast
1/2 teaspoon sugar (optional)
1/2 cup warm water (+ additional if necessary)
1 tbsp. olive oil

Directions:
Preheat oven to 450 degrees. Place a sheet of parchment paper on a pizza pan or cookie sheet. In a medium-sized bowl whisk together quinoa flour, teff flour, salt, yeast, and sugar. Pour warm water into the dry ingredients and stir together with a fork. Stir together until a ball of dough forms. If a half cup of water is not enough to create a stiff ball of dough, add 1 tbsp. of additional warm water at a time until you have a ball of dough. Cover bowl with a kitchen towel and allow to rest for 10 minutes. Prepare topping while dough is resting. When ready to pre-bake crust pour 1 tbsp. olive oil onto the parchment paper and spread over paper into about a 12" circle. Place ball of dough onto the oiled parchment paper. Place a piece of plastic wrap over the ball of dough and pat out with your hands into about a 12" circle as seen in pictures above. Remove plastic wrap and place pizza crust into the preheated oven and bake for 10-12 minutes until golden brown and crisp. Remove from oven. Add desired toppings and bake for an additional 10 minutes until toppings are heated through and cheese or cheese-substitute is melted.

Enjoy!! :-)

Our fav toppings: 'shrooms, green peppers, pepperoni

Pin It!

Sunday, November 13, 2011

this week's menu -- sunday cooking


We had a great weekend visiting my sweet friend Betty (who has shared her recipes for blueberry french toast casserole and beans galore -- two favorites at our house!) Betty treated us to a wonderful simple meal of chicken and root vegetables made in the slow cooker on Saturday evening. Michael enjoyed it so much we're having it again this week! I have a lot of upcoming deadlines in the next few weeks, so I won't have time to make dinner in the evenings. Since I had a whole afternoon free today I decided to get busy and get cooking. Our meals will be pre-made this week, along with having a few sandwich nights (Michael's favorite dinner anyway!)

This Week's Challenge: Egg-Free Breakfast Ideas 
I feel like nearly every week I have something challenging to work through. It's usually good things like getting more exercise, more sleep, trying a new recipe, meeting a deadline etc... but I want to connect with you, my readers. This week's challenge is to make protein-rich egg-free breakfasts. Several readers have mentioned on the facebook fan page that they are allergic to eggs and need ideas for healthy breakfasts. SO I'm taking on the challenge to figure out what I can make for breakfast without eggs, but yet with a lot of protein. If you have ideas, please share them in the comments below

This will definitely be an interesting challenge for me because I LOVE eggs and I hope it's a food I never have to go without. It probably wouldn't be much of a stretch for me to say that eggs are my favorite food. They are so versatile and can be used in so many ways... but for those of you who cannot use them -- I know breakfast must be a puzzle at times. So I'm going to test the egg-free breakfast waters and let you know what I come up with! 

What are your strategies for meals on super busy weeks? Do you have a freezer with already made meals? Do you eat out? Share your thoughts in the comments below

Breakfasts this week: 
  • Michael will probably take cereal & milk with him to work every morning. I am making clam chowder to have several mornings, I also have sausage to make some type of casserole possibly, and I'm thinking I might have chicken salad over a spinach or lettuce bed.. 
Lunches this week: 
  • Leftovers -or- lettuce & turkey wraps with fruit
Dinners this week: 
  • Sunday -- Hubs requested sandwiches... I'm having a chicken salad lettuce wrap
  • Monday -- Meatloaf stuffed green peppers with mashed sweet potatoes and a fresh salad
  • Tuesday -- Italian spaghetti squash & meatball casserole with salad or red cabbage slaw
  • Wednesday -- Slow cooked chicken with root vegetables, served with slow cooker applesauce
  • Thursday -- Sandwich/Lettuce Wrap night + raw veggies & fruit
  • Friday -- Leftovers -or- Out to Eat
  • Saturday -- Beef or Chicken Taco Salads


This menu is also being shared at Gluten Free Detroit Metro's blog with the Gluten Free Menu Swap and at Laura's I'm an Organizing Junkie Menu Monday. 


Pin It!

Tuesday, August 23, 2011

gluten free blueberry cobbler recipe


Keeping a big batch of gluten free master baking mix in the cabinet is really helpful. On Saturday, I had a partial container of blueberries that were way past their prime, along with a bag of frozen blueberries that I really needed to use up.

My friend Heather A. came to me a few months ago with an old recipe for blueberry cobbler she had when she was growing up. She wanted to make it gluten free. I don't remember ever really talking about what she should use to make it... so she figured out how to make it gluten free all on her own. Several days later she & her husband met us for dinner at a local restaurant and she brought along her homemade blueberry cobbler. I hadn't had a cobbler like this in ages... with a crusty, cinnamon-y biscuit crust and a wonderfully rich, purple, and just-sweet-enough, blueberry filling. It was delicious.  Between the four of us we completely devoured that cobbler and probably could have eaten another one! Soon after I tried to make the cobbler at home... I added more ingredients, changed things a bit... and it just wasn't as good. Heather was right... keeping it simple was the key to this awesome cobbler.

Saturday when I decided to make the cobbler again I wanted to use my Master Baking Mix. I realized this made making a gluten free version even easier... and it made a darn good casserole. I think even Heather would approve!


Heather's Gluten Free Blueberry Cobbler
adapted by Carrie at gingerlemongirl.com
free of gluten, dairy/casein, eggs, and soy
printer-friendly recipe

Batter Ingredients:
1 cup Gluten Free Master Baking Mix (or gluten free Bisquick)
1/3 cup almond milk
2 tablespoons sugar

Filling Ingredients:
3/4 cup water
2/3 cup sugar
2 tablespoons cornstarch -or- arrowroot starch
3 cups fresh or frozen blueberries

Topping:
1/2 teaspoon cinnamon
2 teaspoons sugar
2 tbsp. butter -or- coconut oil -or- non-stick cooking spray

Directions:
Preheat oven to 425 degrees. Grease a small casserole dish and set aside. In a small bowl mix together the gluten free master baking mix, almond milk and 2 tablespoons of sugar until you have a thick batter. Set aside. In a small saucepan add water, 2/3 cup sugar, and cornstarch. Mix or whisk together and cook over high heat, stirring constantly until boiling. Allow to boil for 1 minute. The cornstarch/water mixture will turn translucent and thicken. Remove from heat and add blueberries.  Pour blueberry filling into the greased baking dish. Drop the master mix batter by tablespoons on top of the blueberry filling and use a fork to spread evenly over the casserole. It doesn't have to be perfectly covered. Mix cinnamon and 2 teaspoons sugar in a small bowl and sprinkle over the top of the casserole. Dot with butter, coconut oil, or spritz the top of the casserole with non-stick cooking spray (this will help the casserole to brown). Bake for 25-30 minutes until the top of the casserole is golden brown and the blueberry filling is bubbling around the edges. If your casserole dish is too small, you may want to place a cookie sheet underneath the dish to keep it from spilling over in your oven. Allow to cool for about 30 minutes before serving. Serve as is or at room temperature... serve with ice-cream, whipped cream... or my favorite -- just plain the way it is! Enjoy!


Pin It!

Saturday, May 21, 2011

Gluten Free Chocolate Cobbler/ Hot Fudge Sauce Cake Recipe


My mom-in-law and dad-in-law came over this afternoon, they helped deliver a new lawn mower for hubs. He's been wanting one for a while and the state income tax refund came back just in time, since our yard looks more like a jungle than the suburbs. 

The house is a mess, but I managed to wipe down the bathroom counters before they arrived! I made a super easy ground beef stew and pondered what to make for dessert. 

You see, I ALWAYS serve dessert to my inlaws. I know we don't need dessert, but dessert is special. I like dessert. It makes a meal for company seem complete! 

I only had a small amount of ice-cream in the freezer, as hubs supply was dwindling... but I did have some coconut ice-cream as well... and father-in-law loves coconut. What could I serve with it? 

I remember several times my great-grandma making what she called a "puddin' cake." A very easy cake that created it's own sauce/pudding on the bottom and I LOVED that cake! I browsed the web, looked through a few of my favorite church cookbooks, and finally settled on a tweaked version of this Chocolate Cobbler recipe


The best part of this dessert is how insanely EASY it is to throw together. It's a bit unconventional and I have no idea exactly how it works chemically to create that amazing sauce... but it works! No, it isn't the prettiest dessert you could make, but it sure is tasty! I used my homemade gluten free master baking mix as the base and I am SO pleased at how delicious it turned out. 

Please make this dessert... it's a hit when your in-laws come over and watch movies with you after having a very humble meal of ground beef stew. How I love cozy Saturday afternoons with family. Especially when they end with a chocolate dessert! 

Gluten Free Chocolate Cobbler/ Hot Fudge Sauce Cake Recipe
Free of gluten, dairy/casein, soy, and eggs

Cobber/Cake Ingredients: 
4 tablespoons coconut oil 
1/2 cup sugar
2 heaping tablespoons cocoa powder
3/4 cup almond milk -or- your favorite nondairy milk
1 teaspoon vanilla
Cobbler/Cake Topping: 
1/3 cup sugar
1/4 cup cocoa powder
1 1/2 cups boiling water

Directions:
Heat oven to 350 degrees. Spoon coconut oil into a casserole dish or large pie pan. Place the pan in the oven to melt the coconut oil. In a medium sized bowl mix together the homemade master baking mix, sugar, cocoa powder, almond milk, and vanilla. The batter should be have the texture/thickness of a muffin batter, if necessary, add additional almond milk 1 tablespoon at a time until you have a thick, but pour-able batter. Using a potholder, remove the baking dish with the melted coconut oil from the oven. Pour the cake/cobbler batter into the dish and spread it evenly. The melted coconut oil will probably come up over the batter, that is okay! In a small bowl mix together the sugar & cocoa powder for the topping and sprinkle evenly over the cake/cobbler batter. Lastly pour the boiling hot water over the whole cake. It will look like a hot crazy mess, but trust me it will work! Place the cobbler/cake in the oven and bake for 35 minutes until the top is crusty & dark brown. If it seems to be browning too much mid-way through baking simply place a sheet of foil over the the baking dish. VERY IMPORTANT: After 35 minutes remove the cobbler from the oven and allow it to cool for about 35-40 minutes before serving. This will allow the fudge sauce to "set" beneath the chocolate cake crust.  Serve warm (it will still be warm after 35-40 minutes!!) with ice-cream, whipped cream, or just by itself! It's delicious! Enjoy!


Pin It!

Wednesday, April 27, 2011

Gluten Free Vegan German Chocolate Cake Recipe


Gluten Free, Vegan German Chocolate Cake anyone? Anyone? I've made this cake twice during the past two weeks, first for a gluten free cookout with some dear friends & then for Easter Sunday. 

It was a hit. I had completely forgotten how much I LOVE German Chocolate Cake. I haven't had it in YEARS. It was memorable for me to make this cake because it was a favorite of my great-grandmother's. I miss her so much! I know she would have been proud of this cake. (Well she wouldn't have understood the point of the whole vegan thing, but that's okay! lol) 

This cake is actually quite simple to make! I simply took my favorite gluten free chocolate cake recipe and then added Susan of FatFreeVegan's German Chocolate Cake filling. I chose Susan's filling because it didn't use any artificial ingredients and I wanted a recipe that was casein free/ dairy free.

That's it! 

I did make some changes, but they were slight: 
That's all I changed. Everything else was the same and you can better believe I'll be making this dessert for YEARS to come! I loved making it. It was cathartic to me and very meaningful to know that I had learned how to make a gluten free version of one of the cakes my great-grandmother made when I was growing up!

I hope you will enjoy it as much as I have!

Thoughtfully,
Carrie

PS... I will be attending the Charlotte NC GF/AF Expo this weekend. If you're in the area, please stop by! Tickets are still available for $10 at the door -- a serious STEAL for the amount of programs being presented and the incredible number of vendors that will be there!!  I hope to meet you there!
Pin It!

Sunday, March 27, 2011

Gluten Free Whole Grain Teff Muffins Recipe


At a recent local gluten free support group meeting one of our wonderful members presented a program on different gluten free flours and how to use them. She brought a delicious batch of gluten free teff muffins from a Bette Hagman cookbook. The muffins were incredible. Deeply rich and distinctly tasted like the whole wheat bran muffins I remembered from my gluten days.

I decided to try the muffins this morning with my own personal revisions (since apparently it's impossible for me make ANY recipe as is... lol)

I am so impressed with these muffins. The only type of teff I could find locally was a bag of whole teff grains. The are TINY grains -- I believe they might be considered the smallest grains in the world. I pondered what exactly to do with them and then realized I could probably grind them in my vitamix since they were so small! I poured about 1 cup of grains into the vitamix and ground them slowly for a minute or two. The end result was a soft, slightly grainy flour.

It worked! I made a large batch of muffins so I could take them to work this week for breakfast. the texture of these muffins is incredible. It really does remind me of bran muffins by texture and taste! I am low on eggs at the moment, so I used Ener-G Egg Replacer and additional oil in place of eggs. It made the muffins not rise quite as high as they would have otherwise, but it didn't affect the flavor one bit! I also left gums out of these muffins and added my favorite ground flax seeds which means additional healthy fiber and omega-3's!

I've also started measuring my flours by weight in addition to volume for those of you who prefer to measure ingredients by weight. I'll always be a cup & teaspoons girl myself, but it is fun to see how much the different flours each weigh separately. I hope this will be a helpful addition my recipes.


Gluten Free Teff Muffins
free of gluten, dairy/casein, soy, corn, gums, potatoes, eggs
adapted from a Bette Hagman recipe from, "The Gluten Free Gourmet Cooks Comfort Foods"
(I made a large batch so that I could take these for breakfast this week)
Makes 18 regular sized muffins
printer-friendly recipe

Dry Ingredients:
1 1/3 cups (228 gm) teff flour
2/3 cup (80 gm) arrowroot starch
1/4 cup (28 gm) ground flax seeds
1/2 tsp. salt
2 tsp. baking powder
1 tsp. baking soda
1/2 cup (102 gm) sugar

Wet Ingredients:
4 eggs -OR- 1/2 cup (145 gm) warm water + 2 tbsp. EnerG egg replacer whisked together
1/2 cup (95 gm) oil
1 cup (240 gm) non-dairy milk (I used almond milk)

Optional Add In's:
1/2 cup chopped nuts (55 gm) -- I used chopped walnuts
1/2 cup raisins (76 gm)

Directions:
Preheat oven to 350 degrees. Line 2 cupcake/muffin pans with paper liners or spritz with non-stick cooking spray. (I was able to make 18 of them). In a large bowl whisk together all dry ingredients. In a smaller bowl mix together all wet ingredients and pour into dry ingredients. Mix just until thoroughly combined. Fold in chopped nuts or raisins. Fill cupcake liners 3/4 full with muffin batter. Bake for 20-25 minutes or until a toothpick inserted in the muffins comes out clean. The muffins with be dark brown -- almost "chocolately" in appearance. If you use eggs the muffins will have tall domed tops, if you use egg replacer as I did, they will just reach the top of the muffin liner and have a flat top -- either way they are still delicious!! Allow muffins to cool 10-15 minutes before eating. If they are not allowed to cool properly they will have a taste slightly gooey.

Nutrition Information Per Muffin using egg-replacer (18 Muffins):
171 calories, 9 grams fat, 2 grams fiber, 2 grams protein

Carrie's Ingredient Notes:
  • Flours: I used teff flour as my main whole grain in this recipe. The flour gives these muffins the distinct bran-like flavor they have, but feel free to use the same amount of your favorite whole grain flour, although know they will have a slightly different taste. I use arrowroot starch exclusively as my starch of choice, although you could easily sub this with cornstarch, potato starch, or white rice flour.
  • Sugar: In this initial recipe I used regular white sugar. You could also use brown sugar, coconut sugar, date sugar etc... feel free to use the sugar you like best. You could also reduce the sugar by a 1/3 in this recipe without having a big difference in the flavor of the muffins.
  • Oil: I generally use canola oil or olive oil in my recipes. Feel free to use the oil of your choice. It should not adversely affect the texture or taste of these muffins. You could also use 1/4 cup oil + 1/4 cup applesauce to cut back on both fat content and calories.
  • Ground Flax Seeds: These serve several purposes in this recipe. First they add a nuttiness and a lot of healthy fiber to the recipe. Secondly when ground flax seeds are introduced to a liquid they start to gel slightly, so they take the place of using xanthan gum for texture in this recipe. I don't advise leaving them out of the recipe. You could use 2 tbsp of ground chia seeds in place of the flax if you prefer.
  • Non-Dairy Milk: Use regular milk or your preferred non-dairy milk. I always use almond milk since I can find it locally.
Pin It!

Thursday, January 27, 2011

{Gluten Free One Pot Meals} Ground Turkey & Quinoa Skillet Meal Recipe


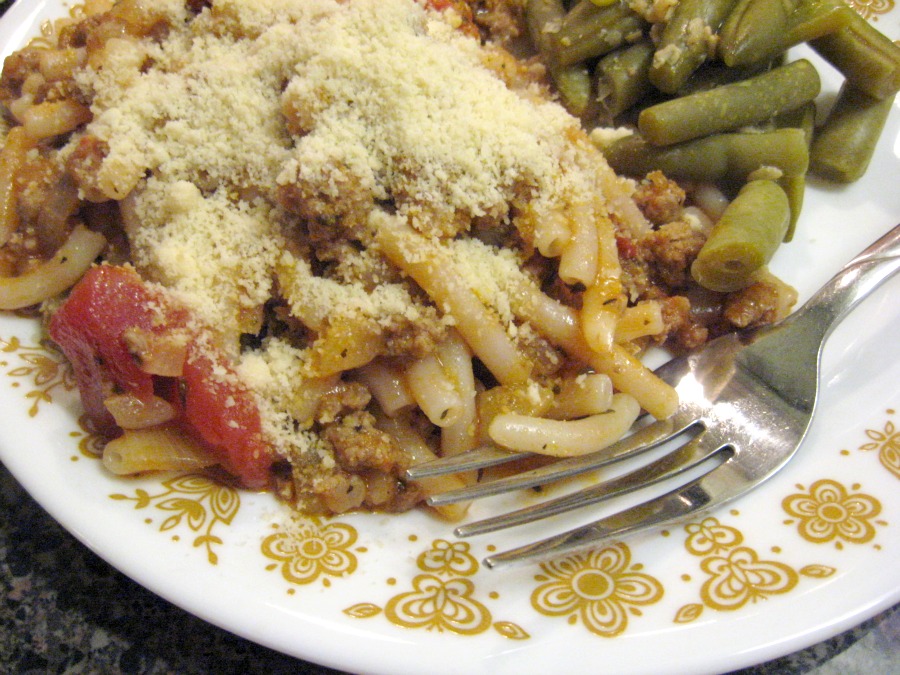
Okay, I know this isn't the most appetizing meal you've ever seen. And the lighting in my kitchen at 8:30pm in the winter kinda stinks... but the one pot meal? Very good, very quick, and even husband friendly!

I'm starting a new series this week entitled, "Gluten Free One Pot Meals." I think I deserve a sticker for originality.

So the concept isn't anything new. But whether you work full time, commute an hour to work, stay home with your kids, dinner time can often be tough to figure out.

Last summer we addressed this issue with Gluten Free Quick & Easy Meals. A number of wonderful gluten free bloggers helped me out by sharing their favorite quick and easy meals.

This time I'm hoping to post a "One Pot Meal" once a week. I don't plan on having a time frame for this series. One pot, easy meals are needed year round.  "One pot" can meal anything from my dutch oven, to the pizza pan, to the frying pan, to a wok, etc...

This week's one pot meal uses my favorite large skillet. It's a 12" non-stick pan I received when Michael & I got married. It's still one of my favorite pans. These recipes will not be meals that are set in stone. Make them with the ingredients you have on hand. If you don't have any quinoa, or if it scares you, or if you have picky eaters... then use brown rice -or- gf pasta -or- gf bread cubes -or- cooked potatoes. Go crazy and try your own variations!


Ground Turkey, Vegetable & Quinoa Skillet Meal
- a gluten free recipe template by Carrie @ Gingerlemongirl.com -
free of gluten, dairy/casein, soy, and eggs

1 lb. ground turkey (or ground beef, or ground pork, etc...)
1 med. sweet onion, finely chopped 3 cloves garlic, finely minced
2 cups fresh spinach, roughly chopped
2 cups fresh button mushrooms (or baby bella mushrooms) stems removed, and sliced
3 carrots, sliced thinly diagonally
1 cup uncooked quinoa, that's been rinsed with fresh water (or 3 cups cooked quinoa, rice, diced potatoes, etc...)
Olive oil

Directions: In your skillet add 2 cups water and the dry quinoa. Bring the water to a simmer and cook covered for 10-12 minutes until quinoa is fluffy and very little water remains. (A great tutorial on cooking quinoa). Remove the cooked quinoa from the pan, place in a bowl & set aside. Add 1-2 tablespoons of olive oil to the pan. Brown ground turkey. Add onions, and cook for 5-10 minutes until the onions are translucent. Add the garlic to the pan and cook for 2-3 minutes. Add remaining vegetables and cook for about 10 - 15 minutes until they are soft. Stir the cooked quinoa into the mixture. (Alternatively, you could served the cooked vegetables & meat mixture over individual servings of quinoa.) Now, if you're not feeling up to a highly flavored meal you could eat the meal as is. But if you want some flavor variations for your one pot meal, here are some ideas you could use:

For an Asian Inspired Meal: 
  • 1-2 tbsp. soy sauce (or soy sauce sub)
  • a splash of sesame oil
  • a few shakes of roasted sesame seeds
  • a splash of rice vinegar
  • a splash of fish sauce
For an Italian Inspired Meal:
  • Add 1/2 cup of diced tomatoes to the skillet 5 minutes before serving
  • 1 teaspoon dried basil (or 3 tablespoons julienned fresh basil)
  • 1-2 teaspoons dried oregano
  • splash a bit of extra virgin olive oil on each serving, right before eating!
For a Mexican Inspired Meal:
  • Add 1/2 cup of your favorite salsa to the skillet 5 minutes before serving
  • Add 1/4 cup freshly chopped cilantro
  • Serve with diced avocado or avocado slices
  • 1-2 tsp. chili powder
  • 1-2 tsp. cumin
  • 1 tsp. adobo seasoning

What flavorings/seasonings/add in's would you use? 
What types of skillet/one pot meals would you like to see featured? 


Pin It!

Friday, January 14, 2011

Gluten Free 2-Ingredient Fudge Sauce Recipe


One of my favorite blogs of all time is "Heather Eats Almond Butter." If you're not a fan you should be! Heather's blog is fun and full of simple, easy recipes and she just had a lovely little daughter.

Heather lost weight several years ago and even after having a baby has maintained a healthy weight. She eats almond butter... among other healthy things!

One of the struggles I've had is that I really love healthy fats! Natural almond butter, peanut butter, coconut oil, extra virgin olive oil, etc.. you name it and I really love it!

Part of my problem was that I was simply eating too much of it... you can have TOO much of a good thing! Too much of a healthy food!

So if you decide to make this "healthy", dairy free, gluten free chocolate sauce... make sure to keep your portion in check! 1 tablespoon has about 55 calories... and 1 tablespoon is just enough of a treat to add to my morning bowl of 1/2 cup of gluten free cooked rolled oats!

This "not really a recipe" was sort of an accident. Heather, of the above mentioned blog, had a post on a 2 ingredient fudge that she made. She used coconut milk and baking chocolate. BUT... being the "ADD, prone to not paying attention" kind of girl that I am. I didn't fully read the directions. She used 16 oz. of baking chocolate. My chocolate bar was only 4 oz. And therefore, I ended up with a lovely & decadent chocolate SAUCE, rather than a fully formed fudge! And really after figuring out the calories on this delicious concoction... I'm glad I only used 4 oz of chocolate! lol!!

This is not a really sweet fudge sauce since we don't add any sugar, but it's so creamy, rich and delicious! Enjoy!

Gluten Free 2-Ingredient Fudge Sauce Recipe
free of gluten, dairy/casein, and soy protein (the chocolate does contain soy lecithin)
makes about 1 1/2 cups of chocolate sauce
that's about 24 tablespoons at roughly 55 calories per tablespoon - so use it sparingly!

1 (12 oz.) can of full fat coconut milk - Native Forest is my fav brand - No sulfites
4 oz. dairy free chocolate - I used 4 oz. of  Lindz 70% chocolate bars

Directions:
Melt the chocolate bar over low heat in a small saucepan. Add the coconut milk and stir consistantly for about 3-4 minutes until the sauce is slowly simmering and is a deep chocolate color. Pour into a glass jar and refrigerate for at least 8 hours. The sauce will be thick enough to hold a spoon upright in the container. Makes 24 servings!  Add a tablespoon to your oatmeal, your ice cream! Enjoy as a treat!
Pin It!

Tuesday, December 21, 2010

Gluten Free Chocolate Pinwheel Refrigerator Cookies Recipe


It's the time for cookies! I remember making cookies like this during the holidays when I was growing up. You made a basic sugar cookie dough shaped it into a log and then refrigerated it for 30 minutes to an hour to help the shape set. After waiting for the dough to chill... then easy as pie you sliced the dough, baked it and voila... really pretty cookies!

This is one of my favorite recipes this year! I was inspired by this cookbook that I found at one of my favorite thrift stores:


It's an old Southern Living cookbook from 1986 that I think was was included in magazine subscriptions at the time. Whatever it was published for... it's a really great little book! It has classic & retro recipes that I remember and most are easy to re-create gluten free! You can find the book on ebay here.

I can't decide if I want to make these cookies or spritz cookies for my neighborhood cookie swap on Wednesday evening...what to you think? I'll share the spritz cookies with you tomorrow!

Gluten Free Classic Chocolate Pinwheels
free of gluten, dairy/casein, corn, soy (and egg-free option)
adapted from "Christmas Cookies" by Southern Living, 1986
Makes around 24 cookies
printer-friendly recipe

Wet Ingredients:
1/2 cup Spectrum Palm Shortening
1/2 cup sugar
3 tablespoons almond milk
1 egg yolk (for egg free - use 1 tablespoon grapeseed or olive oil)
1/2 teaspoon vanilla

Dry Ingredients:
1/2 cup brown rice flour
1/2 cup millet flour
1/2 cup arrowroot starch
1/2 teaspoon xanthan gum (or 1/2 teaspoon guar gum for corn-free version)
1 1/2 teaspoons corn-free baking powder
1/8 teaspoon salt

For Chocolate Swirl:
1 oz. of allergen free chocolate, melted

Directions:
In a large bowl cream the spectrum palm shortening & sugar together. Add almond milk, egg yolk (or oil), and vanilla extract. In another bowl whisk together all dry ingredients. Slowly add dry ingredients to wet ingredients. Mix until you have a slightly sticky cookie dough. Split the dough in half and roll into two large balls. TO one half of the dough stir in 1 oz. of melted chocolate. On a dry, flat surface that has been covered with plastic wrap sprinkle a few tablespoons of arrowroot starch (to keep the dough from sticking). Place the plain ball of dough on the flat surface. Place a sheet of plastic wrap on top of the dough and then roll it out into a roughly 9x13 rectangle. Place the chocolate dough on top of the plain dough and gently roll it or flatten it with the bottom of your hand over the plain dough. It does not have to be spread out perfectly. Once the chocolate dough is mostly spread out over the plain dough, you can shape the edges so they are mostly straight or you can cut them so that they are straight. Starting with a long side of the dough roll it up into a log. Wrap it in plastic wrap and refrigerate for at least 30 minutes - several hours. When you're ready to bake, remove the log of dough from the refrigerator. Unwrap it and slice into about 24 cookies. Heat your oven to 350 degrees. Place cookie slices on a cookie sheet that's lined with parchment paper or a silpat mat. Bake for 7-9 minutes until cookies are light brown on the edges. Allow the cookies to COOL on the cookie sheet for about 10-15 minutes before moving to a wire rack to finish cooling.

This post is linked to: Slightly Indulgent Tuesday 12.21.10
Pin It!

Tuesday, December 7, 2010

Gluten Free, Vegan Dark Chocolate Muffins Recipe


Late fall is the perfect time for hearty, dark chocolate, gluten free muffins. The taste of these muffins actually reminds me of an oreo cookie. Deeply chocolate, with just a touch of sweetness. I think our early snow this year prompted me to make muffins. During warmer weather I'm not a muffin fan. I'd rather have a smoothie... but when it's chilly and you need something to go with your mug of hot tea... this rich chocolately muffin fits the bill!

These muffins are also incredibly healthy. Rice free, corn free, soy free, egg free, xanthan gum free, dairy/casein free, gluten free, with very little refined sugar. If you like to make food for holiday gifts this muffin mix would be perfect! You can place the dry ingredients in a jar and then create a recipe card that includes the wet ingredients & instructions for baking.

The muffins themselves are a tad bit crumbly simply because I do not include xanthan gum or guar gum in this recipe (more for simplicity's sake than anything else) but feel free to add 1/2 teaspoon - 1 teaspoon for a more traditional muffin texture.  For less crumbly muffins, allow them to rest on a wire rack to cool for at least 20 minutes and longer if possible.

Gluten Free, Vegan Dark Chocolate Muffins
free of gluten, dairy/casein, soy, corn, eggs, gums, rice, yeast
created by Carrie @ www.gingerlemongirl.com
printer-friendly recipe

Makes 12 regular muffins, or 24 mini-muffins

Dry Ingredients:
1/2 cup millet flour
1/2 cup blanched almond flour
1/2 cup sorghum flour
3 tablespoons cocoa powder
2 tablespoons ground flax seeds
1 teaspoon chia seeds
2 teaspoons baking powder
1/2 teaspoon cinnamon
1/2 teaspoon baking soda
1/4 teaspoon sea salt

Wet Ingredients:
1/2 cup applesauce or pumpkin puree
1/2 cup extra virgin olive oil -or- canola oil
1/3 cup agave nectar, maple syrup, or honey
1/4 cup almond milk
1 teaspoon vanilla

Add In's 
1/3 cup Enjoy Life Allergen Free Chocolate Chips (these are minis - which work great for muffins!)

Directions:
Preheat oven to 350 degrees. Line a 12 cup muffin tin with paper liners. (I HIGHLY recommend using paper liners for this recipe.) In a large bowl whisk together all dry ingredients. In a smaller bowl mix together all wet ingredients. Pour wet ingredients into dry ingredients and mix together until you have a wet batter. Allow the batter to rest for 5 minutes to thicken. (The chia seeds & ground flax seeds will thicken the batter and give it the texture of a "regular" muffin batter.) Stir in the chocolate chips. Fill the paper liners about 3/4 full of muffin batter. Bake for 20-25 minutes until the a toothpick inserted in the middle of a muffin comes out with very few crumbs, or until you can gently touch the top of a muffin and it does not leave an impression.


Carrie's Notes:
  • As stated above, these muffins have a very tender crumb (which is often the case with vegan muffins). If you want more of a cake like texture, feel free to add 1/2 teaspoon of xanthan gum or guar gum for a thicker muffin batter. 
  • Oil: I added more oil to this recipe than I generally use for muffins. This really helps the muffins stay moist and overall it means that there is about 2 teaspoons of oil per muffin (for 12). If you don't want to use 1/2 cup of oil, decrease the amount to 1/4 cup and add an additional 1/4 cup of applesauce or pumpkin puree. The only difference may be that the muffins will not stay quite as moist by day 2 or day 3. 
  • Chia Seeds & Ground Flax Seeds: These are both magical ingredients in egg free baking! Chia seeds have seriously ridiculous gelling power and help thicken up the muffin batter. Ground flax seeds have a wonderful "gelling" property as well, though it's not as potent as the chia seeds. I do recommend keeping the chia seeds in this recipe, if you don't have them another tablespoon of ground flax seeds should work just fine though. 
  • Paper Liners: Because these muffins are delicate, I think it's definitely a good idea to use paper liners. If these muffins stick to the pan without a liner, they may be very hard to remove all in one piece. 
  • Millet flour & Sorghum Flour: If you don't want to use these flours, feel free to exchange them for another whole grain gluten free flour such as brown rice flour, quinoa flour, or even buckwheat flour! 

This post is linked to Amy Green's Slightly Indulgent Tuesdays at Simply Sugar & Gluten Free


Pin It!

Tuesday, November 9, 2010

Gluten Free Beef Italian Skillet Meal (Goulash) Recipe


Here's another favorite recipe from my college days. I'm sure we all grew up eating a basic ground beef casserole like this either with rice or noodles. As a child, I remember from a cookbook that was published by my local elementary school they called this "goulash." I thought that was a really cool name!

My friend Susan shared this recipe with me when I was in college. I remember she came over to my apartment and we made this along with a salad and just enjoyed cooking together. I still have the index card that she wrote the recipe on for me.

This is a super simple, hearty meal that my husband loved. It's easy with just a few simple ingredients and gluten free noodles.

For a casein free topping, I sprinkled blanched almond flour on the top of our servings!

Susan's Beef Italian Skillet Meal
free of gluten, casein/dairy, soy, corn, and eggs
Adapted by Carrie @ www.gingerlemongirl.com
printer-friendly recipe

1 1/2 cups gluten free pasta of your choice (I used these rice noodles from a local Asian market -- they don't get mushy!)
1 lb. ground beef
1 small onion, finely diced
1 stalk celery, finely diced
3 cloves garlic, minced
1 teaspoon dried oregano
1/2 teaspoon dried basil
1/2 teaspoon sea salt
1 teaspoon freshly ground pepper
1 (8 oz.) can tomato sauce + 1/3 cup water
3 tablespoons blanched almond flour (or parmesan cheese) to sprinkle on top of each serving

Directions:
Cook gluten free noodles according to package directions until "al dente" or still slightly firm. Rinse with COLD water to completely stop the cooking process, drain and set aside. Brown ground beef in a large skillet or dutch oven. Add onions and celery and saute for about 5 minutes until onions are soft and transparent. Add garlic, oregano, basil, salt and pepper. Mix tomato sauce with water and add to ground beef and vegetables. Simmer for 10 minutes until mixture is bubbling and heated through. Add cooked pasta to skillet and stir to coat noodles with sauce. Simmer for additional 5 minutes and serve. Sprinkle servings with blanched almond flour or parmesan cheese. Serve with green beans or a salad! Picky kid & husband friendly! Enjoy!
Pin It!

Friday, October 29, 2010

Gluten Free, Vegan Apple Cinnamon Bars Recipe

photo used with permission from Joe of Culinary in the Country

I created this egg free, low sugar bar recipe for Cheryl of GFGoodness probably 2 years ago... I'm a little behind on posting it!

She wanted a recipe that used gluten free rolled oats. She also needed them to be egg free, corn free, and dairy free. (And I think there were a few other qualifications, but I can't remember what they were!)

At any rate, this is what I created for Cheryl. I've had several people test it with wonderful results. These bars are very simple to make and are an easy fall dessert!

I hope you enjoy them... even if I am 2 years behind schedule!

*Many thanks to Chef Joe of Culinary in the Country, for allowing me to use his picture to help me illustrate how delicious these bars are! While Chef Joe's bars are made from wheat flour & oats they look nearly identical to this gluten free version! Thanks Joe! 

Gluten Free, Vegan Apple Cinnamon Bars
Created by Carrie @ Gingerlemongirl.com
free of gluten, dairy/casein, eggs, nuts, gums and soy
printer-friendly recipe.

Bar Ingredients:
½ cup brown rice flour
½ cup arrowroot starch
½ cup sorghum flour
1 teaspoon gluten free, corn free baking powder
1/4 teaspoon salt
1 ½ cups GF certified rolled oats (or half oats and half quinoa flakes)
1/4 – 1/3 cup packed brown sugar
½ – 3/4 cup coconut oil (NOT melted) -or- Spectrum Palm Shortening

Filling Ingredients:
2-3 small apples, any variety, seeds removed, coarsely chopped or grated
2 teaspoons cinnamon
3 tablespoons agave nectar

Directions:
Preheat oven to 350 degrees. Whisk together all flours, baking powder, salt, and GF certified oats. Stir in brown sugar, and lastly cut in coconut oil or Spectrum shortening with a knife or fork, until it resembles very small peas within the dry mixture. You should have a crumbly dough. Press one half of the bar mixture into a greased 8″ square (or small rectangular) pan. In a small saucepan cook chopped apples, cinnamon, and agave nectar just until apples are soft – 10 to 15 minutes. Pour apple mixture over the pressed bar mixture.
Sprinkle second half of bar mixture over the top of apples and pat lightly. Bake at 350 for 30 – 40 minutes or until light brown. Let cool completely before cutting into squares. Makes 9 large bars. Enjoy!
Pin It!