Showing posts with label How To.... Show all posts

Thursday, November 10, 2011

How to Save Money on a Gluten Free & Paleo Diet

One question I've been asked a lot recently is "Isn't eating all that meat & fresh vegetables expensive?" Well... honestly it depends. It can be expensive. It can also be relatively inexpensive depending on what you spend your money on. There are a few tricks I've learned that can make it easier.

First you have to decide what's most important to you. 
If I had unlimited financial resources, I'd try to buy as organic, local, unprocessed, grass-fed as I could. But unfortunately that's not always realistic for us financially and due to where we live. The nearest Whole Foods, Earthfare, and/or Trader Joe's is a good 50-60 miles away in the direction opposite to where we live and work. Trying to make that a weekly shopping trip there would be way too time consuming and costly.  This means, the majority of our fresh vegetables and protein sources are going to come from a regular 'ol chain grocery store in our area. It means the food probably isn't going to be organic, and the protein will not always be the extremely high quality that I would like... but I have to work within my budget and area limitations. I'm good with that. It all depends on what you feel works best for your budget and your family. For me, buying fresh, whole foods that fit within my budget, even if they aren't the highest quality available, is more important than trying to live above my means. 

Work with the resources you have available. 
While I don't have any super cool, high-end grocery stores nearby (which I probably couldn't afford to shop at on a regular basis anyway)... I have researched and found some incredible local resources that I can occasionally use. When the budget allows for it, I will stock up on grass-fed beef from a local farm. It's expensive and we cannot afford buying meat from the farm every month. But I try to stock up on different cuts of beef, ground beef & turkey, and whole chickens. I also researched some of the products in our local grocery store and found out which items were locally made (in Eastern NC:  peanuts, fresh vegetables and starches such as sweet potatoes, milled corn products, honey, pork products) that I could eat.. such as a pork sausage that's made less than 30 miles away and is only sold in a few counties in Eastern NC. It's a little more expensive than major name brands, but I think it's worth the extra few dollars to buy a product at the grocery store that's made in North Carolina. 

Plan your shopping list around what's on sale -- you're shopping seasonally that way! 
For me, I basically shop at one store. With my hectic schedule that includes working full time and commuting I don't have time to shop at several different stores to try to get the absolute best prices. So every week I view the online sales flyer. My grocery store has a neat tool on the website which allows you to create a shopping list from the sales flyer. You can also manually add in any additional foods to your list, which can be printed out, emailed to you, or sent to your smart phone. I basically only shop the perimeter of my grocery store, so I simply look for the produce and proteins that are on sale for the week that can supplement what I have in the freezer from the beef farm. I generally budget $60-$80 per week for the two of us in our family. Another neat tool to use on the grocery store website is online coupons for toiletries, cleaners, dish soap, detergent, etc... I can see if there are any of those products on sale in the flyer & match that with coupons that I can add electronically to my frequent shopper discount card. I'm not a coupon clipper (I have no desire to carry around a notebook of coupons everywhere I go) and I don't use them often since I rarely see coupons for romaine lettuce, carrots, ground beef, or chicken! But it's a handy tool to use on the grocery store website to help me save a little bit of money on household products -- especially since the coupons are stored electronically on my shopper card. Use the tools that your grocery store provides to help you save as much money as possible. Often the vegetables that are on sale are seasonal vegetables in your area. If you have a deep freezer, stock on up meats & chicken when they go on sale! 

Plan your menu around the store sales items. 
Here's where you get to be creative. Often it means cooking without a recipe. Learn about different varieties of seasonings and find the ones you like. If chicken is on sale this week, we're definitely going to have chicken at least once with whatever vegetables were also on sale. Breakfast is usually eggs, sometimes sausage, turkey bacon, regular bacon, sometimes a hash with sauteed potatoes, spinach, peppers, and eggs, sometimes an omelet, sometimes a green smoothie if I'm not feeling up to par. Lunches are generally leftovers from dinner. Learn how to make & season about 15-20 meals that your family really likes. Learn how to adjust them according to your own unique tastes & preferences. 

Nearly all of my weekly menus are based around store sales and what I have in my freezer, here is what we've eaten this week: 

Breakfasts: eggs, seasoned ground beef gravy, thickened with a tiny bit of brown rice flour (not paleo), green smoothies with greens & fruit. 

Lunches: leftovers

Desserts & Snacks: nuts/seeds, dried fruits, dark chocolate (no, it's not paleo!), fresh fruit (usually 1-2 servings a day, as dessert), almond flour muffins sweetened with honey (not every week), nut butters with apples, carrots, or celery, etc... 

Dinners: 
  • Monday -- Cube Steak Stew (cube steak from beef farm with veggies from the previous week)
  • Tuesday -- low carb pizza (made from a base of ground chicken which was on sale and pizza toppings we already had on hand) + salad -- pizza was a treat for me since we were celebrating my husband's birthday with his family -- they all had regular pizza. 
  • Wednesday -- chicken & broccoli served over creamed spinach (chicken & broccoli were on sale this week)
  • Thursday-- meatloaf, mashed butternut squash, and Caesar salad (meatloaf made from beef in the freezer, butternut squash from sale last week, and salad from this week's produce)
  • Friday-- breakfast for dinner -- scrambled eggs, turkey bacon, sauteed kale (perfect example of a grocery store "perimeter" meal -- also time to start planning for next week's menu
  • Saturday -- slow cooker chicken at our friend Betty's house (who was awesome enough to email me ahead of time to make sure I could eat everything!) 
  • Sunday -- roast beef or chicken with mashed sweet potatoes, green beans, and sauteed kale (chicken or beef from the farm with pantry green beans, and the last of the week's produce)

I hope this gives you a few ideas on how you can save money even when eating real, whole, naturally gluten free & paleo foods. What are your favorite tips? What grocery preferences do you have? Do you stick with organic, local foods? Do you plan your meals around grocery store sales? Do you use coupons? Please share your thoughts here on the blog! 


Pin It!

Tuesday, July 19, 2011

A frugal gluten free gift idea


Here's a super easy & frugal gift idea for you.

For Father's Day I decided to give my Dad a bunch of my homemade gluten free chocolate chip cookies. It may seem silly since he doesn't follow a gluten free diet himself... but he loves these cookies! Why not make a gift out of them? I also gave him a jar of homemade pickles I canned last summer and some of my favorite cooking seasoning.

I found an old tin that I was about to recycle and I colored a label on white paper with cookies on it. I glued the label to the tin. Taped an additional label on top and made a batch of my gluten free chocolate chip cookies. I made the cookies super small -- bite size really -- so the whole batch would fit in the tin without being smashed or broken. It worked great.

Michael and I also made homemade cards to go along with all the other homemade treats and I think for my Dad it was one of the best gifts I had ever given him.

So when you can't think of anything to give, or if you need to give someone a gift but don't have a lot of money to spend... make a batch of bite-size gluten free cookies! The people you love will be so impressed at how much time & thought you put into their homemade gift.

What are your favorite types of frugal, homemade gifts?
Pin It!

Sunday, April 3, 2011

This Week's Menu with A Pantry Casserole Recipe Template


A few reasons I previously "stopped" posting our gluten free menus: 1) they can be boring & repetitive... do you really want to know how often we eat tuna salad? and 2) I often forgot to plan...

I've realized in the past few weeks that even though our menu can be a bit boring, and even if I don't follow it completely... it's SO much easier to eat healthily when I take a few hours to plan out our meals. 

After my weekly coaching session with Cheryl of Harris Whole Health today, I'm going to focus more this week on eating less refined/baked carbs and being more mindful of eating healthy complex carbohydrates at meals. I think the hardest part of letting go of more baked goods is simply that I love to bake. It's an outlet for me, and even though I may only do it once or twice a week at the most it's a stress reliever that's important to me. And while I'm not completely restricted from eating gluten free baked goods... I know it's tempting when they are around the house, even if they are in the freezer. So if I'm able to bake this week, I may attempt something with almond flour, so it would be much lower on the glycemic index.

Breakfasts This Week:
Lunch This Week: 
  • Most days: planned leftovers from dinner and/or cucumber tomato salad . If dinner leftovers don't work out: peanut butter & jelly sandwich on Udi's bread with a sliced apple and carrot sticks. Make sure not to eat gluten free baked goods on days that you have a sandwich for lunch!
 Dinners this Week: 
  • Sunday -  Simple Roast Chicken + green beans with almonds + cheddar mashed potatoes
  • Monday - Homemade Ground Turkey Tacos served with quick "Spanish" rice + steamed broccoli
  • Tuesday - Baked Potatoes topped with homemade ground turkey chili + simple romaine salad
  • Wednesday - Chicken Stirfry using a bag of frozen stir fry vegetables served over brown rice
  • Thursday - Pantry Chicken Casserole -- see recipe below
  • Friday - Pizza Night! Trying a pizza from "Against the Grain"

Sunday Night Pre- Meal Preparations:
  • Make homemade ground turkey chili and pre-bake baked potatoes for a quick dinner on Tuesday. 
  • Boil eggs & shell them. Make the 7 grain cereal in the rice cooker for the upcoming week. 
  • Shred lettuce & dice tomatoes for ground turkey tacos. 
  • Make ground turkey taco filling, so it only needs to be reheated on Monday night. 
  • Make simple cucumber, tomato, radish & olive salad for last minute lunches and/or to serve with dinners that need an additional quick veggie. 
  • Remove chicken from freezer and place in fridge to defrost for Wednesday night's stir fry. 


My canned goods "pantry." We use a lot of canned goods, especially in the fall and winter and on "lean" grocery weeks. Having a well-stocked pantry is essential when you need quick meals. I often use the canned fruit for last minute green smoothies. I use canned vegetables & beans with several meals during the week -- I'd buy more frozen vegetables but we have a tiny freezer! I love having soy free, dolphin safe tuna (most brands have broth made from soy protein) in the pantry for tuna salad and tuna melts. Peanut butter & almond butter for sandwiches and to spread on apple slices, etc... Knowing I have a pantry full of vegetables, beans, fruits, gluten free pasta, and gluten free grains means I can whip together a casserole pretty quickly during the week. I'm not sure I've ever made the same casserole twice though, much to the disappointment of my husband! This is generally how I create weeknight pantry casseroles:

Quick Gluten Free Pantry Casserole Recipe Template
Here's an easy way to construct a pantry casserole or hot pot depending on which region of the country you are from. We make a meal like this at least once a week. Have fun and use what you have on hand. It may not always be the prettiest meal, but it will always be healthy & filling. 
  1. 1-2 cups cooked, chopped protein (chicken, beans, ground beef or turkey, tofu, pork, etc..)
  2. 1-2 cups cooked starch (gluten free pasta, rice, brown rice, potatoes, sweet potatoes, wild rice, millet, quinoa, aramanth, etc..)
  3. 3 cups your favorite vegetables, either pre-cooked, frozen, canned (and drained), or raw (chopped into bite size pieces) = (zucchini/yellow squash, mushrooms, green or red peppers, broccoli, cauliflower, tomatoes, green beans, kale, spinach, carrots, garden peas, asparagus, etc...)
  4. 2-3 cups liquid (chicken broth, plain tomato sauce, spaghetti sauce, salsa, beef broth, vegetable broth, homemade gluten free "cream soup", etc..)
  5. Seasonings & Spices: use what you like with the flavor you like... here's are two great guides for different international flavors:  Cooking Light World Cuisine Spice Guide & Cooking With Us - Cultural Spice Guide
  6. Toppings (optional - I usually don't add a topping -- but for company and presentation it's nice!) -- blanched almond flour is awesome and looks & tastes like parmesan cheese when sprinkled evenly over casserole, bread crumbs or crushed corn tortillas, sliced almonds, shredded cheese if you're a dairy person, etc...
Directions:
Super fast casserole: Preheat oven to 350 degrees. To make this uber fast, simply toss all ingredients but the topping in a large bowl and mix together. Pour casserole mixture into a greased 9x13 casserole dish -or- 2 quart baking dish. Sprinkle on toppings if desired. Bake for 30 minutes until casserole is heated through. 
Layered casserole: Preheat oven to 350 degrees. Grease casserole dish. Add ingredients in layers and sprinkle your seasonings on each layer (layer of protein, layer of starch, layer of vegetables etc). Pour liquid of choice over casserole. Add toppings if desired.  Bake for 30 minutes or until casserole is heated through. 

Allow to cool for about 10 minutes before serving!

***************


Other great gluten free menus this week can be found at Celiac Family who is hosting this week's gluten free menu swap! 

An amazing roundup of menus of ALL kinds can be found at OrgJunkie.com


Pin It!

Friday, August 7, 2009

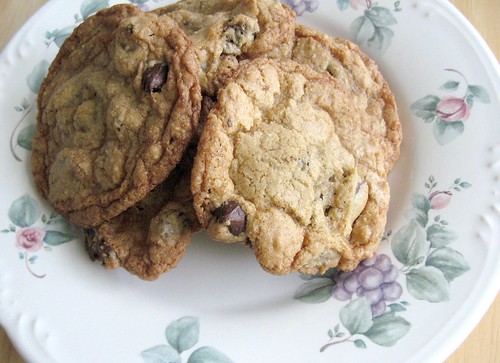
Gluten Free Chocolate Chip Cookies Recipe - Take 2


Sometimes even a great recipe needs a few changes.

These cookies were one of the first successful gluten free recipes I created. This recipe was originally posted in November 2007. The recipe has since won a gluten free baking contest, sparked chocolate chip cookie debates on the Gluten Free Recipe Swap Group, and been a great conversational dessert for gluten eating friends.

Yet, despite how good the cookies are, I have received quite a few emails from readers who had trouble making them. A few of the problems people have encountered:

- the cookies spread
- some people do not want to use Crisco for nutritional reasons
- the cookies turned out too gooey in the middle
- the cookies did not puff up, etc…

So... I’ve made some changes.

I’ve worked with this recipe for over 2 years and I’ve changed an ingredient, updated the technique of forming the cookies and I hope I’ve come up with a recipe that will bake up beautifully for you!

The original recipe is still the base. As a matter of fact I’ve only changed one ingredient. BUT… the method of baking is slightly different.

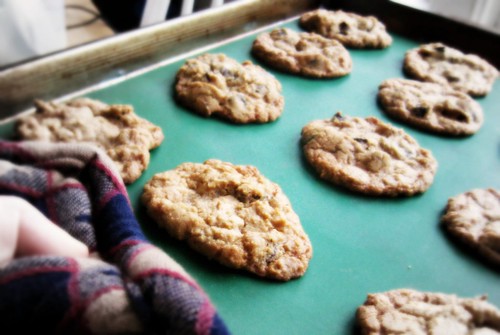
  • When spooning the cookie dough onto the baking sheet only use about 1 tablespoon of dough per cookie. It doesn't sound like much, but the cookies will spread just enough to make a round 1"-2" cookie.
  • When you are baking these cookies I highly recommend using a silpat mat or a sheet of parchment paper. Unfortunately no matter how you create them… gluten free baked goods just stick. Parchment paper (or a silpat mat) not only prevents the cookies from sticking, but it helps them to spread into their proper cookie shape.
  • I also leave the cookies undisturbed on the parchment paper or mat after baking for about 20 minutes before putting them on a wire rack to finish cooling. This helps the cookies to cool into their shapes and helps the cookie structure “stay put.”

As far as the ingredient change, I started using Spectrum Palm shortening as the “fat” in the recipe. Unlike Crisco, the Spectrum Palm oil is completely free of trans-fats. Spectrum is organic and is 100% expeller pressed palm oil. I’ve found (after making these cookies many times) that you only need half the amount of palm oil compared to the Crisco. So while Spectrum Palm Shortening is more expensive, you’ll only use half as much!

Are you ready to try the *new* best gluten free chocolate chip cookies ever? I want to hear about your results!! Please email me at gingerlemongirl (at) gmail (dot) com or post a comment below!


The Best Gluten Free Chocolate Chip Cookies
Created by Carrie @ http://www.gingerlemongirl.com
(Free of gluten, casein, and soy)

Wet Ingredients:
1/4 cup Spectrum Palm Shortening
1/4 cup granulated sugar
3/4 cup brown sugar
1 egg
1 1/2 tsp. vanilla extract

Dry Ingredients:
1/2 cup tapioca flour -or- arrowroot starch (lately I've only been using arrowroot)
1/2 cup sorghum flour -or- millet flour
1/4 cup brown rice flour
1/2 tsp. kosher salt
1/4 tsp. xanthan gum (optional)
1 tsp. baking powder
1/2 tsp. baking soda

Add In's:
6 oz. gluten free or allergen free chocolate chips

Directions:

Preheat oven to 350 degrees. In a large bowl: cream butter with sugars until light and fluffy. Add egg and vanilla. In a separate bowl mix together flours, salt, xanthan gum (opt.), baking powder, and baking soda. Slowly add flour mixture to butter and sugar mixture. Lastly, mix in chocolate chips. Place tablespoon sized dough portions 2 inches apart on a cookie sheet lined with parchment paper or a silpat mat. Bake 7-9 minutes or JUST UNTIL edges are light brown.

(The cookies WILL NOT look completely cooked when you pull them out of the oven! That's what you want! That's part of the secret to these awesome cookies! DO NOT overbake them!)

Allow cookies to cool undisturbed on parchment paper or silpat mat on the cookie sheet for 10-15 minutes. Then move cookies to wire baking rack to continue cooling. Store cookies in an airtight container on the counter.

This recipe doubles easily.

(Printer-friendly recipe.)


Carrie's Cooking Notes:

  • Xanthan gum is completely optional in this recipe, but I think adding just a tiny bit makes for a chewier gluten-free cookie and helps the cookie to retain its proper shape!
  • Egg Free option: If you cannot have eggs, simply use 1 tablespoon of ground flax seeds mixed with 3 tablespoons of warm water to replace the egg in this recipe. It still makes fantastic gluten free (egg free!) chocolate chip cookies!
  • Sorghum flour -or- millet flour: I love both of these gluten free flours. Some people detect a bitter taste in sorghum flour, if that is the case for you, I definitely recommend using millet flour. It does not have a distinct taste and works beautifully in these cookies! The only downfall to using millet is it may create a very slight "grainy" texture in the cookies.
  • Use of other "sugars" in this recipe: I don't recommend using a different type of sugar in this recipe. The basic white granulated sugar and brown sugar are very important for the structure of these cookies. Other sugars such as turbinado, demerera, or date sugar may not work correctly in the cookies when baking.
  • Other fats: You can use other fats in this recipe such as 1/4 cup coconut oil, or butter... but you may not get the same crisp results as you get with the Spectrum Palm Shortening. I recommend trying the cookies with the palm shortening first.


Don't miss a single recipe from Ginger Lemon Girl!
Enter your email address here for each post to be delivered right to your inbox:

Delivered by FeedBurner

Pin It!

Wednesday, May 6, 2009

Homemade Almond Cheese (Gluten Free, Casein Free, Soy Free)


Nut cheese

Stop laughing... seriously, that's what it's called! And it's good! And you're still laughing.. ;-P

It's okay... laughing is good for you! I hope most of my posts bring a smile to you! I'm all about smiles!

So once again... today's post is about nut cheese.

I used to think it was funny when vegetarians or people who didn't eat meat, dairy, you name it.. ended up cooking and eating what I considered "fake foods." Not necessarily foods that were bad, but foods created to make up for the loss of something like say a hamburger... people ate soy burgers or bean burgers. I just thought that was plain silly. My thinking used to be "If you're not gonna eat a "real" burger, than just don't eat one... don't try to substitute, that will only make things worse."

Once again... huge foot in mouth!

Since going gluten free I have definitely learned how to make healthy and delicious substitutes. I HAD to learn how to make those foods effectively when I couldn't eat wheat. Gluten free versions of biscuits, pancakes, bread... and now? I can't even tell the difference. I understand why people need substitutes.

About a year into the gluten free diet I became aware of allergic reactions I was also having to soy products: soy sauce, edamame, tofu, soy flour, you name it and my throat would swell up. Not a pleasant feeling. I realized that by default I had been avoiding soy for months because I always reacted after eating it.

And nearly 3 months ago after eliminating foods, I realized I was also reacting to dairy and casein products. In hindsight this makes a lot of sense. It's very common for people who are sensitive to the gluten protein to also be sensitive to the proteins in dairy and soy since they are so similar in nature.

While I had trouble cutting wheat and soy out of my diet, it honestly was not as difficult as dairy and casein. I love anything dairy... and to cut out cheese, yogurt, milk, ICE CREAM? Oh my... I just was not sure I could do that.

Which is why I decided to learn how to make substitutes with nuts. Almonds, cashews, pecans, walnuts... they have become close friends! ;-)

I would be lying if I told you that this almond cheese tastes exactly like real dairy cheese. It does not. But it makes a wonderful substitution and definitely fulfills a cheese craving!! This cheese reminds me in taste of a flavored cream cheese and sour cream with a touch of hummus! In texture, it's very similar to ricotta! If you miss having real cheese, it's definitely worth your while to try!

Today's recipe once again uses almonds. I love almonds for their delicate taste and their absolute versatility in cooking and baking!! We'll make an almond-dill cheese with a few simple ingredients, a white cotton cloth or sprouting bag, and your blender!

(For a great online photo-tutorial of making nut cheese, please click here.)


Almond Dill Cheese

1 1/2 cups raw almonds, soaked 12 hours
1 1/2 cups water
3 tablespoons hummus
1 tablespoon coconut oil (or oil of your choice)
juice from 1-2 medium lemons
1 tablespoon dill weed
1-2 teaspoons sea salt (or more to taste)
1/4 - 1/2 teaspoon pure garlic granules or (garlic seasoning of your choice)


Method:

Rinse almonds thoroughly in fresh cold water, drain and put into blender. Add 1 1/2 cups spring water. Blend on highest setting for 3-4 minutes. Stop blender, add remaining ingredients and blend until very, very smooth (an additional 3-5 minutes.)

Open and place sprout bag or cotton cloth in a large bowl or pitcher. (In the pictures below I actually used a clean white cotton pillowcase, that I also use for wringing water out of greens!)


almond cheese just beginning to drip, you can see a very small amount of whey in the pitcher

Pour the almond cheese mixture into the bag and close with drawstrings, rubber band, or a twist tie as I did. Place bag of almond cheese mixture in pitcher or bowl so that it will drip and strain for 12 hours. Place draining cheese in the refrigerator for 12-24 hours to thoroughly drip. You can also let the mixture ferment slightly (to further sour and develop the flavor) by allowing the cheese to strain on the counter for 6 hours and then moving it to the refrigerator to strain for the remaining time period.

When the cheese is ready, serve chilled with gluten free crackers (or my favorite pretzels) or carrots and celery! Enjoy!!

Store cheese in a tightly sealed container in the refrigerator for up to 5 days. Just be aware... you might get addicted to this delicious nut cheese!


almond cheese after straining for 6 hours, notice the amount of whey that has drained

Carrie's Notes:

* The leftover drained liquid is WHEY, you can still use this liquid or you can toss it. It's up to you. If you like to soak grains in Nourishing Traditions style, such as buckwheat, millet, brown rice, or even dried beans you can use some of this liquid to quicken soaking time and assist grains and beans in the sprouting process. For more information on how you can use leftover whey, click here (keep in mind most of these suggestions are using items with gluten or dairy, but you can also use whey with almost any kind of gluten free flour or food.)

* You can use all different kinds of RAW nuts in this recipe, macadamias (although I have heard not to soak them, as it can alter the taste), cashews, pecans, walnuts, brazil nuts, etc... I prefer using raw almonds because they are so mild in taste and really give a beautiful white color to the cheese.

* You can add ALL kinds of wonderful savory additions to this cheese!! Green onions, chives, parsley, garlic... you name it, you can probably add it!! Let me know what you add to your almond cheese!

* I highly recommend soaking the almonds ahead of time. It begins the sprouting process which makes the almonds more nutritious and much easier on your blender! Don't skip soaking!! ;-)

* I am thoroughly looking forward to using this nut cheese as a replacement for ricotta cheese in lasagna!! I will probably slightly change the seasonings for a ricotta/cottage cheese type sub! If you try the cheese in this manner, please let me know what you think!!


Digg!
Pin It!

Friday, March 27, 2009

Spaghetti Squash (Naturally Gluten Free)


I have found a new reason to love spaghetti. Not that I really needed another reason, I've always loved spaghetti... but following a low carb diet means no noodles, not even gluten free ones. Just sauce.

And who wants just sauce? Even good sauce?

Enter spaghetti squash. I really thought it would be awful. I tried it once before a few years ago, and it didn't go over well. Michael wouldn't eat it. I ate it, but not joyfully.

And you need to enjoy it if you're going to eat it on a regular basis.

I truly misjudged spaghetti squash. It really needed a 2nd chance. I wish I had given it a second chance sooner!

One forkful of truly well-roasted, tender, al dente spaghetti squash, and I am a convert. It is simply that good. Very good indeed. As a matter of fact, I love it so much now, I'll eat it plain with a splash of olive oil and just a touch of freshly grated nutmeg. Oh my. It's seriously mouth-watering my friends!

Don't believe me? Try it once (unless you're my husband)... and I can almost bet that you'll be adding spaghetti squash to your weekly grocery list.

Here's how to make it:

Roasted Spaghetti Squash

1 2-3 lb. spaghetti squash
Good quality olive oil
Freshly ground pepper
Sea Salt
1/2 cup water

That's it.. that's all you need folks...

Preheat oven to 35o degrees. Split the spaghetti squash in half with a very sharp knife. Scoop out the seeds and stringy stuff (i'm sure there is a better term for this, but I can't think of one at the moment). Place the two sides skin down in a large baking dish. Drizzle 3-4 tablespoons of good olive oil over the two peices of squash. Sprinkle several teaspoons of freshly ground black pepper and sea salt over the squash. Finally drizzle about 1/4 cup of water over the two pieces of squash and add the remaining 1/4 cup of water to the baking dish (this will help to steam the squash.) Roast in a 350 oven for 35-50 minutes until the edges of the squash are just turning slightly golden and caramelizing. Remove from oven and allow to cool in baking dish for several minutes. Using a folk, scrape out strands of spaghetti squash. I usually make my squash first, and then place the roasted strands in a covered, insulated dish to stay warm while I make my sauce.

Serve hot! This makes 3-4 cups of spaghetti "strands." Serve with your favorite pasta sauce. Roasted spaghetti squash reheats well and freezes well!


Oh... what?... You wanted to know how to make the incredible looking sauce in the picture above? Well, you'll have to go visit Pioneer Woman for that amazing recipe! Just use spaghetti squash as your base instead of linguini.
Pin It!

Monday, March 2, 2009

Lessons and Tips for Gluten Free Bread Baking


Does this look familiar? For reader Jennifer it was a familiar sight. She had made this bread several times and each time the bread would rise and bake beautifully, yet once it cooled, it would collapse in on all four sides. Jennifer described it as collapsing like a "mushroom."

Jennifer emailed me to ask for help in making her loaf of bread. I decided to make the exact same loaf she was making and see what I could do to help her.

Jennifer used a Bette Hagman recipe in which she changed a few of the ingredients to make the bread casein free as well as gluten free. Jennifer also realized later that she had used a portion of brown rice flour in her flour mix to try to add additional fiber to the recipe. To be honest, at first I thought the reason her bread was collapsing was due to Jennifer's change of ingredients. I studied the ingredients carefully and decided to use the original Bette Hagman flour mix. I decided to also make the bread casein free (exactly as Jennifer had done) so that I could mimic the method in which Jennifer made the recipe.


Gluten Free Sandwich Bread
Adapted from Bette Hagman's recipe in The Gluten Free Gourmet: Living Well Without Wheat, 1st edition.

Dry Ingredients:

2 cups Bette Hagman Flour Mix (See below)
2 tablespoons sugar
1 1/2 teaspoons xanthan gum
1/2 teaspoon salt

Leavening Ingredients:
1 cup soymilk (or other non-dairy milk), warmed for 1 min in microwave
1 1/2 teaspoons yeast

Wet Ingredients:
2 tablespoons oil (I used olive oil)
2 eggs
1 teaspoon vinegar (I used apple cider vinegar)

** Bette Hagman's Flour Mix:
2 parts white rice flour
2/3 part potato starch flour (NOT potato flour)
1/3 part tapioca flour
--Mix flours together and store in an airtight container in your pantry, until ready for use.

**Ingredient Notes: I did make a few slight changes to the recipe reflected above. The original recipe called for 2 teaspoons of xanthan gum, which I thought was too much for this small loaf of bread. I also decreased the sugar from 3 tablespoons to 2 tablespoons and I believe you could decrease this even further.

Jennifer's original instructions stated basically: to proof the yeast with the heated soy milk, mix dry ingredients together, add wet ingredients and yeast mixture. Let rise for 30-45 minutes and then bake at 450(F) for 10 minutes, then reduce to 350(F) and bake for 30 minutes longer.


I decided to follow my own method of mixing gluten free bread dough, which you find in a detailed post, here. Please follow this method for making this excellent loaf of gluten free bread.

During my experiment making Jennifer's bread I realized several things that could possibly have been the cause for Jennifer's bread to collapse. The following list is a series of tips which I hope will help you in your gluten free bread baking.


*Tips for Mixing Ingredients:


- Make sure to mix all dry ingredients (excluding yeast) in a large bowl using a whisk to thoroughly combine them. If sugar is an ingredient in your recipe, you do not have to add it to the yeast mixture. It can be whisked into the dry ingredients and will not compromise the outcome of the loaf.

- If you use a "flour mixture" such as Bette Hagman's (listed above) make sure that it is fresh. Tapioca starch, brown rice flour, and any flour that is considered a whole grain or is milled from a whole "seed" or "pearl" can go rancid easily. This will definitely affect the flavor and possibly texture of your loaf. Simply taste a very small amount of the dry ingredients on your tongue to make sure they do not taste rancid. You will be able to detect a very bitter flavor if they are.

- Whisk all these wet ingredients together first: eggs, vinegar if called for, and oil or melted fat. Whisk them together thoroughly and then pour in your wet proofed yeast mixture. Combine this with your egg mixture thoroughly.

- If you decide to CHANGE the ingredients in your recipe, you need to be VERY careful about the ratio of starches to whole grains. If your have a large volume of whole grains compared to your starches, this CAN cause your bread to collapse upon cooling because whole grains are generally heavier than starches. For example: in the recipe above, if you want to start adding whole grains, start SLOW... I would start by exchanging 1/4 part of the white rice flour called for with brown rice flour. If that works out for you, then add another 1/4 part of whole grains to your next batch. Also note that some whole grains are heavier than others: for example, millet and sorghum flours are heavier than brown rice flour, so you would need to experiment with a smaller amount at first.

- Some recipes call for apple cider vinegar as a dough enhancer. Some gluten free bakers prefer to use this ingredient while others do not. I personally think that vinegar has great ability to help your loaf of bread rise correctly, but it's really up to your own preferences. It will not greatly affect your loaf one way or the other if you leave it out.

- Dough softeners: Some recipes also call for using plain, non-flavored gelatin and/or fruit pectin (Sure Jell) added to the dry ingredients. These substances help the texture of your gluten free loaf to be soft and pliable like "wheat" yeast bread. I personally think these ingredients are wonderful, while other bakers choose to leave them out. If you want to add them to your bread, simply add 1/2 teaspoon of one or both to your recipe and see how it works for you! You can add more or less depending on how soft/pliable you enjoy your bread!

- Texture and stability ingredients (xanthan gum and guar gum): Both of these ingredients improve the texture of your gluten free bread. I personally use as little xanthan gum as I can in recipes because I am very sensitive to the taste and gummy texture it provides... BUT for gluten free yeast bread it is ESSENTIAL to use one or a mixture of both of these products. Start with 1 1/2 teaspoons if you are sensitive to xanthan gum and add more to your next batch until you get the texture you desire. I typically only use 1 - 1 1/2 teaspoons of xanthan gum in the majority of my yeast bread recipes.


*Tips for Proofing Yeast:


- Many gluten free bread recipes call for nearly 1 tablespoon or more of yeast. I believe that large amount is completely unnecessary for most yeast bread recipes. I typically use 1 1/2 teaspoons of active dry yeast in my bread recipes and this works very well. The breads I have tried using this amount have risen just as sufficiently as breads with higher amounts. By using less yeast in your recipes you can possibly prevent your family members from developing a food intolerance to yeast and you'll also save money since you won't have to buy large amounts of yeast as often as you did before!!

- If you do not have a food thermometer to measure the temperature of your heated milk, simply microwave it for 40 seconds to 1 minute and mix it with the yeast. It the mixture does not become bubbly and slightly risen within the next 5-10 minutes you'll need to start over again with new yeast. This is very important! If you overheat the milk then it will cook the yeast and kill it. Yet, if the milk is too cool it will not activate the yeast to start growing. If you use a food thermometer, the heated milk should be around 100-110 degrees for the yeast to begin proofing.


*Tips for choosing the correct pan for baking your gluten free bread:


- Make SURE to read your recipe carefully and use the correct pan size! I generally use an 8 1/2 x 4 1/2 size loaf pan. It's a smaller loaf (usually considered a 1 lb. loaf), but it will allow the bread to rise slightly higher without collapsing upon cooling.

- When you first pour your bread dough in the pan, if it is filling the loaf pan MORE than 1/2 full you'll need to use a slightly larger pan.

- If you use a pan that is TOO large, your bread will rise higher than it is supposed too and can definitely collapse upon cooling.


* Tips for letting the bread rise:

- The best way to allow gluten free yeast bread to rise is in an enclosed, slightly warm environment. The best way to do this is to turn your oven on to 200 degrees to preheat for 5 minutes while you are mixing your bread dough. TURN THE OVEN OFF at the end of 5 minutes so you will not COOK the rising dough. This warm moist environment of your oven will allow the bread to rise quickly and evenly throughout the pan.

- Make sure you have greased the pan you are letting the bread rise in, otherwise, it will definitely stick to the your pan!!

- Make sure to spritz the plastic wrap you are using to cover your rising loaf with non-stick cooking spray! Otherwise the plastic wrap will definitely stick to your loaf and cause it to collapse as you try to pull away the sticking wrap.

- ONLY allow your bread to rise about 1" above the lip of the pan. If it rises higher than that, it will most likely collapse upon cooling because the bread does not contain strands of gluten to hold it up!!


* Tips for Baking:

- The BEST method I have found for baking MOST gluten free yeast breads is to simply preheat your oven (after rising your dough) to 350 degrees and bake your bread for 35-55 minutes until the internal temperature of the bread reaches between 200-210 degrees F. I definitely recommend buying a food thermometer if you do not have one, to measure the temperature of your bread accurately. Your bread can easily be under-done and doughy if you do not bake it long enough. Your bread can also over-bake and dry out if baked too long.

- Jennifer's original recipe called for the bread to bake at 450 degrees F for 10 minutes, and then turn the heat down to 350 degrees for another 30 minutes. I personally do not find this high temperature necessary to start baking gluten free bread. I believe beginning the baking cycle at such a high temperature could create an air pocket directly beneath the surface of your crust, which could cause the loaf to greatly collapse upon cooling. A constant baking temperature of 350 degrees has worked well on every gluten free loaf of bread I have made.

- IF you are using a GLASS or CERAMIC baking pan, make sure to lower the temperature of your oven by 25 degrees so you do not overbake your bread. Reader Claire pointed out that these types of bakeware retain heat longer and can continue to "bake" your bread when it is pulled out of the oven. Glass and ceramic bakewear can also conduct heat more quickly and evenly than aluminum or tin and can cause your bread to overbake.

- Make sure your oven temperature is CORRECT for baking!! My personal oven UNDER-HEATS by 30 degrees, so I actually have to set the temperature of my oven to 380 degrees to actually reach the 350 degree temperature. I use this type of oven thermometer. This is a very easy way for you to make sure your bread is baking at the correct temperature.


* Tips for cooling, serving, and storing your gluten free bread:

- If it is at all possible, I HIGHLY recommend for you to allow your bread to cool for at LEAST one hour after being removed from the oven. I personally try to allow my bread to cool for 1-3 hours on a cooling rack before slicing. Often your bread is still "baking" when you take it from the oven. If you slice your bread immediately from the oven it can "shock" the freshly baked loaf, qhich can cause the bread to lose heat quickly from the point where you sliced it and collapse.

- Let your bread cool in the pan for 15-20 minutes and then remove it from the pan and allow to cool completely on a cooling rack, which allows air to circulate around the bread.


- When you are ready to slice your bread, use a bread knife. These knifes are made finely serrated and they cut quickly and evenly through your bread. It makes a clean cut and a very pretty and even slice.

- Once your bread has cooled COMPLETELY, I recommend wrapping it in plastic wrap or a tea towel to keep the bread moist and then placing it in a large ziplock bag. Remove the air from the bag as you are closing it. It will stay fresh on your counter for 2-3 days. If you and your family will not eat the bread in that period of time, I recommend slicing it and freezing it until you are ready to use it.

- If you used a dough softener, your bread should retain moisture and pliability so that you do not necessarily need to toast each slice for it to be enjoyable. Some gluten free breads do need to be toasted to be fully enjoyed. The particular sandwich bread recipe in this post though is very soft, pliable, and tastes great without being toasted!

- When in doubt, freeze your slices of leftover bread until you are ready to use them. If I freeze my bread, I let it defrost on the counter wrapped in a tea towel before using it. If you let your bread slices defrost slowly on the counter (instead of instantly toasting them) the slices should retain enough moisture to be tasty without being toasted.


****************

The following pictures are of Jennifer's bread after she followed my advice on baking her bread. Her new loaf of bread turned out beautifully and did not collapse! Jennifer said she felt confident that she could bake more gluten free bread in the future!

I appreciate all your hard work and communication during this project Jennifer! I learned a lot and I truly appreciate all your help!!


Here is Jennifer's gluten free bread dough rising. This is really a beautiful loaf of bread!


Notice how Jennifer only allowed her bread to rise just barely over the lip of the pan. This is a really great rise!! Good job Jennifer!


Jennifer's finished loaf of bread cooling first in the pan. Look at how golden and lovely this loaf is! Notice the air pockets around the bread sides of the loaf! Her yeast was working well in this loaf!


Jennifer transferred her loaf of bread to finish cooling on a cooking rack. The loaf did not collapse! It does just slightly shrink at the top where there were small air pockets underneath the surface, but that is completely normal! This is a gorgeous loaf!!


Jennifer's beautifully finished loaf ready for slicing! Notice all the air pockets in her loaf, which means her bread is soft and pliable and rose perfectly! The bread also has a fantastic golden crust!! Great pictures and great job Jennifer! Thank you so much for your excellent question and this great baking experience!


*****************


Want to make your own gluten free yeast/sandwich bread?

Here are some of my favorite gluten free bread recipes:


Carrie's Favorite Gluten Free Sandwich Bread
- This is simply my favorite sandwich bread. While it has a lengthy ingredient list, it is a bread primarily made with whole grains, tastes fabulous, stays fresh, soft, and pliable, and is easy to make.


Carrie's Maple Oat Bread
- A beautiful round loaf of yeast bread, perfect for holiday dinners or to make rolls. This bread reminds me of my favorite pre-gluten Hawaiian sweet bread!


Elizabeth Barbone's Easy Sandwich Bread
- This is a fantastic beginner gluten free bread recipe to build your courage and show you that YOU CAN make gluten free yeast bread!


Natalie's Millet Oatmeal Bread
- An excellent loaf of bread that looks and tastes like whole wheat bread. It's got a beautiful texture and very yummy taste!


Gluten Free Cooking School's Gluten Free Sandwich Bread
- This is another really good GF sandwich bread recipe from Gluten Free Cooking School. Mary Frances has a very budget conscious gluten free flour mix to use for this loaf:


Gluten Free Gobsmacked's Sorghum-Flax Bread
- This is a wonderful, hearty, whole grain sandwich bread! I highly recommend making it!


Pin It!

Sunday, October 12, 2008

Easy Gluten Free Pie Crust


If I could give you the best recipes on to try from Ginger Lemon Girl... I would say try those incredible chocolate chip cookies, my Everyday Carrot Cake, my sandwich bread, my cream cheese meltaways, and the lovely pie crust we're featuring here today!

I cannot tell you how excited I am about this pie crust. It's EASY. Really, really easy, and it's so simple. It rolls out beautifully, even compared to that other crust I really love (yet actually made me so mad two weeks ago that I threw my rolling pin across the kitchen in a moment of sheer "pie-crust-roll-out" anger!)

This crust is also flaky and delicious. Keep in mind that it is also not one bit healthy. It uses an entire stick of butter for ONE CRUST. It's also an "all-starch" crust, save for the redeeming bit of sorghum flour... but for goodness sakes, is a pie crust really supposed to be healthy? Of course not! IT'S PIE crust!

This recipe is actually a revamp of my Cream Cheese Meltaways cookies. Last Christmas when I made these cookies I realized that they completely did not spread when I baked them. So I decided to roll them out and make sugar cookies with them as well. The dough made PERFECT sugar cookies and it rolled out like a charm. The wheels started turning way back then about using the dough as a pie crust. I exchanged most of the sugar in the recipe for a bit more flour and said a prayer! It worked. It made a PERFECT crust. A gluten free crust that was easy to handle. A gluten free crust that was forgiving. It's the best pie crust I've ever made.

Don't shy away from the long directions! They are NOT hard, simply thorough! I will add pictures the next time I make the crust, so you can see how delightfully easy it is!


Easy Gluten Free Pie Crust

4 ounces cream cheese **
4 ounces (1/2 cup, or 1 stick) butter**
3/4 cup cornstarch
1/2 cup tapioca flour
1/2 cup white rice flour
1/4 cup sorghum flour
1/4 teaspoon salt
1 tablespoon granulated sugar


Directions:


*30 minutes before making pie crust, remove butter and cream cheese from fridge and set on counter to soften.

Preheat your oven to 350 degrees. Mix together softened cream cheese and butter. Mix remaining dry ingredients in a small bowl and whisk together. Add dry mixture slowly to cream cheese mixture. If you use a stand mixer this will be easy, and you can slowly combine the ingredients on medium speed for 2-3 minutes until dough forms a stiff ball. If mixing by hand, this may take 5-8 minutes to combine well enough to form into a stiff ball.

You can chill dough if you like, but you can also use this dough immediately. When ready to use dough, place two sheets of a good quality plastic wrap on your counter or table. Place the sheets of plastic wrap side by side, slightly overlapping, to give you enough space to roll out a 9"or 10" crust. Sprinkle white rice flour on the plastic wrap and place the dough in the center.

Sprinkle additional white rice flour on top of the ball of dough. Then, place a new sheet of plastic wrap on top of the ball of dough (so it won't stick to the roller) and start to roll out your pie crust starting from the center. Roll out the crust to 1/4" thickness, or however thick you desire. I actually had enough dough to make a large 10" pie crust along with a smaller 8" pie crust. So you could probably make 2 (9") crusts with this dough if you desired.

Gently place crust in pie or tart shell and bake as directed in your recipe of choice.

*** Please be aware that because the dough does not contain gluten it may STILL tear while you are transferring it to the pie tin. That is OKAY!! This dough is very forgiving and you can simply press the dough back together in the pie tin and even "patch" the dough if necessary with leftover crust! It will "mesh" together beautifully and is very, very forgiving!! ***

(Printer Friendly Version)

Additional Gluten Free Pie Crust Hints and Tips:


To prebake shell for fruit pies or savory pies and tarts: Simply press crust into your pie tin or tart shell and bake in a preheated 350 degree oven for 10 minutes. Add fillings and follow your recipe as directed.

** Casein Free Pie Crust Options: While I have not tried, this, I believe you could successfully use Tofutti in place of the cream cheese and a casein free shortening such as Crisco or possibly Spectrum in place of the butter with successful results. If you try this, please let me know how it works for you!

Sweet and Savory Crust Flavor Options: For sweet pie crusts or for fruit pies, I would add an additional tablespoon or two of sugar to the crust. You could even add a splash of vanilla or cinnamon. For a more savory crust for meat pies and tarts, add italian seasonings, fresh dill, or garlic... there are SO many things you can do with this crust!

Make your own pie crust mix: Simply mix together all dry ingredients together and place in a ziplock bag or tightly sealed container of your choice so that you can quickly put together a gluten free pie crust in minutes. I am going to make 6-8 bags of this pie crust mix for the upcoming holidays!

Corn-free option: If you cannot use cornstarch, arrowroot flour or sweet rice flour can be used in place of the cornstarch.

Using Quality Plastic Wrap to roll out dough: I have learned that cheap plastic wrap will not work properly when you are trying to roll out a pie crust. Trust me... you'll end up throwing your rolling pin across the kitchen and shouting things that are never normally uttered from your mouth. I recommend using a product such as Saran Wrap, or something similar, which will perfectly stick to your counters and the dough without being TOO sticky or not sticky enough (either of which can make the dough VERY hard to work with!!)


Stay tuned for the recipe for that delicious Sweet Tomato and Feta Tart you see pictured above!


Pin It!

Wednesday, September 24, 2008

How to use homemade Gluten Free Cream Soup


Hop over to my frugal blog, Heart of a Servant for a super easy and frugal recipe for homemade cream soup and to discover all the versatile uses for this great, super easy recipe!

Here are a few recipes that use this cream soup:

Stacy's Pork Chops
Tuna Casserole
Sweet Corn Pudding
Gluten Free Gravy
Michael's Rustic Chicken Pie
Cheddar Baked Hominy


Pin It!

Tuesday, September 16, 2008

Please join the new Gluten Free Recipe Swap!


This is your official invitiation to a new Yahoo group, made especially for anyone who would like to share and swap gluten free recipes. You do not need to have a blog or website to participate.
  • Share your favorite gluten free recipes!
  • Ask gluten free cooking and baking questions!
  • Share your gluten free cooking stories, baking mishaps, and successes!
  • Make new gluten free friends!
  • New to the gluten free diet? Need support and help? Join the Gluten Free Recipe Swap!
I hope you will join and share this with your friends! I can't wait to get the gluten free conversations started at the Gluten Free Recipe Swap!


Pin It!

Monday, August 18, 2008

How to Make and Bake Gluten Free Bread


Today I'm sharing with a step-by-step guide on how to make and bake gluten free bread. I know making this bread can be extremely challenging especially for folks who have never made homemade breads before. (And trust me, even with lots of gluten free baking experience, you can STILL make bread that falls!!)

To begin gluten free bread making, I suggest using a very simple starter recipe, such as Elizabeth Barbone's Easy Gluten Free Sandwich Bread. Her great recipe has a short list of easy-to-obtain ingredients, and very easy instructions. Her recipe is the one I used for this demonstration.

Ready to bake? Let's go!


First, gather all of your ingredients.
Here, I have all my dry ingredients on the counter.

Visit this detailed post on how to correctly measure dry ingredients for baking.


Mix together all your dry ingredients (excluding the yeast), and whisk them together thoroughly. Whisking is very important, as it will thoroughly combine all of your gluten free flours, dry milk powder, salt, and xanthan gum. No one wants to take a big bite of xanthan gum in their bread!!


Next, you will need to heat up the recommended amount of water for the recipe. In Elizabeth's recipe it's 1 3/4 cups. I heat the water in a small measuring cup in the microwave for 1 minute and 10 seconds. You will need to use a candy/cooking thermometer to see that water is about 110 degrees. You don't want the water hotter than that or it will kill the yeast and not activate it.

Pour 1 1/2 cups of the warm water in a medium sized bowl. With the leftover 1/4 cup, add your yeast and mix together thoroughly. Set this aside. (This is called "proofing" the yeast, it's to make sure that your yeast is active and will rise!)


While we are waiting for the yeast to proof, let's mix together the rest of the wet ingredients into the bowl of warm water. Elizabeth's recipe calls for 2 large eggs and 2 tablespoons of oil. Whisk all these ingredients together thoroughly.


Now let's check back on the yeast. It should be very bubbly and active, and as you can see in the measuring cup it's "risen" significantly.
If the yeast mixture hasn't changed at all since you mixed it, you need to start over with fresh yeast and water.


Now let's add the yeast mixture to the rest of the wet ingredients. Whisk them together thoroughly!


Now it's time to create the bread dough. Pour the dry ingredients into the bowl of your electric -or- stand mixer.


Using the paddle attachment on medium speed, slowly add the wet ingredients to the dry. Mix this for 5 minutes on med-high speed.


The bread dough will look like a VERY thick cake batter or cookie dough. If you are used to making wheat breads, this will NOT resemble wheat bread dough at all.


Now we need to create a warm environment for your bread to rise. Turn on your oven to 200 degrees, once it's reached 200, turn it off immediately! If your oven doesn't automatically let you know when the oven has reached 200 degrees turn it off after about 4 minutes of heating. You do NOT want the oven to continue heating while your bread is rising, you simply want to create a warm, draft-free environment.


Now let's place the dough into our loaf pan. You can use a metal loaf pan, ceramic loaf pan, or a glass loaf pan.

Just remember if you use glass, you will need to automatically lower the temp. of your oven by 25 degrees during baking (not rising), so that you won't overbake your bread.


Spray your loaf pan with non-stick cooking spray and pour your bread dough into the pan. Using a rubber spatula shape the dough into a loaf.


Now, take a piece of plastic wrap and spray one side of it with non-stick cooking spray. Place the sprayed-side face down, LOOSELY over your loaf pan, and place the pan in the warmed oven.


Set your kitchen timer for about 50 minutes and go wash the dishes... or play with the cats...


Okay... the bread should have risen at least an inch or two above the lip of the bread pan by now, it should look something like this:


I actually let the bread rise for slightly too long. Your goal is just to let the bread rise about 1 inch above the top of your pan. It's perfectly okay to let it rise higher, but be aware that because our gluten free bread doesn't have "wheat gluten" strands to hold it up, it may deflate slightly upon cooling after baking.
Now, take the plastic wrap off the bread and heat your oven to 350 degrees.


* If you have had trouble baking in the past, you may need to buy an
oven thermometer so that you can monitor the correct temp. in your oven.


*Again, remember if you use a GLASS loaf pan, to cut the oven temperature by 25 degrees.


Place your risen loaf of bread in the preheated oven and let it bake for 45-55 minutes. If after about 30 minutes your bread seems to be over-browning, you can loosely place a sheet of aluminum foil over it. Checking the bread here, it looks fine!


Now it's been 55 minutes. Pull the bread out of the oven. Now, we need to use the candy thermometer again to make sure the bread is done. Stick the thermometer somewhere in the middle of the loaf. It should read between 200 and 210 degrees. If your bread did not reach this temperature, place it back in the oven for another 10 minutes or so.


Here's the finished loaf of bread. It did deflate slightly (see, I told you I still make mistakes!), but it's still a nicely risen loaf of bread. If you can wait (and golly it will be hard, because the aroma is heavenly!) allow your bread to cool on a cooling rack for about half on hour before slicing.


Once the bread has cooled, have at it!! If you have a bread knife, this is the best tool to slice gluten free bread.
This loaf tastes amazing and is great for sandwiches!!


As a matter of fact... I think I'll make one now! Yum!


If you have ANY questions about baking gluten free bread, please email me at gingerlemon_girl (at) yahoo (dot) com or leave me a comment below!!

Enjoy making and baking your gluten free bread!!


Pin It!